

How to Digitally Sign a Macro for Excel Using a Code Signing Certificate
 (8 votes, average: 5.00 out of 5)
VBA macro-based malware is making a surprising comeback. The Bumblebee malware loader targets U.S. businesses with macro-laced Word files. Learn how to protect your legit Excel docs from being used by cybercriminals.
Macros are simple sets of instructions in Visual Basic for Applications (VBA) language that can be embedded in Excel and other Microsoft Office desktop programs. They save time by automating just about any repetitive task. They’re dead easy to create and can be used to automatically launch files, format cells, or manipulate data in:
- Excel,
- Word, and
- PowerPoint.
While this is a great way to increase productivity, there’s a catch: Macros make fantastic attack vectors. Combine them with email, and you get an explosive mix. Cybercriminals can easily manipulate your macros to embed malicious code into legitimate-looking Microsoft Office files and send them as attachments in phishing emails. When the victim opens the file and enables the macro, it triggers a series of actions that, ultimately, execute malicious code.
Want to protect your company’s reputation and customers from this common threat? This is where knowing how to digitally sign your Excel macro file(s) can help. When you add a digital signature to your Excel macros, you’re proving that your macros are authentic and haven’t been modified. Explore how to digitally sign a macro for Excel and how to verify its digital signature.
How to Digitally Sign Excel Macros Using a Code Signing Certificate
Before we start to digitally sign and timestamp your macros in Excel, you’ll have to carry out the following one-time operations:
- Purchase a code signing certificate from a renowned certificate authority (CA). You don’t have one? We can hook you up.
Save Up to 27% on a Standard Code Signing Certificate
Assert your organization’s verified digital identity to increase trust in your software and updates. Boost your sales and download rates for as little as $195.00/year (with a 3-year certificate).
- Set up the secure hardware token where your certificate’s private key is stored. Since June 2023, all private keys must be stored on secure hardware. If you don’t have one, you can purchase a secure USB token from the CA when you order your code signing certificate.
- Download and install the Microsoft SignTool.exe x86 version. (More on that later in this article).
- Download the Subject Interface Package for Digitally Signing VBA Projects. To install it:
- Double-click on the .exe file and accept the license agreement. Choose an installation folder where to extract it. Click Save.
- Open a command line (cmd) prompt as administrator. Type “cmd” in the Windows search box. Under Command Prompt select Run as administrator.
- Type the following command before hitting Enter: regsvr32.exe Yourpathto msosip.dll. A pop-up will appear, confirming that the msosip.dll file (included in the package downloaded in step one) has installed successfully. (Tip: Be sure to replace “YourPathTo” with the location where you saved the extracted files.)
- Repeat step 2 with one caveat. Replace “msosip.dll” with “msosipx.dll” to install the second library using the following command: regsvr32.exe yourpathto msosipx.dll
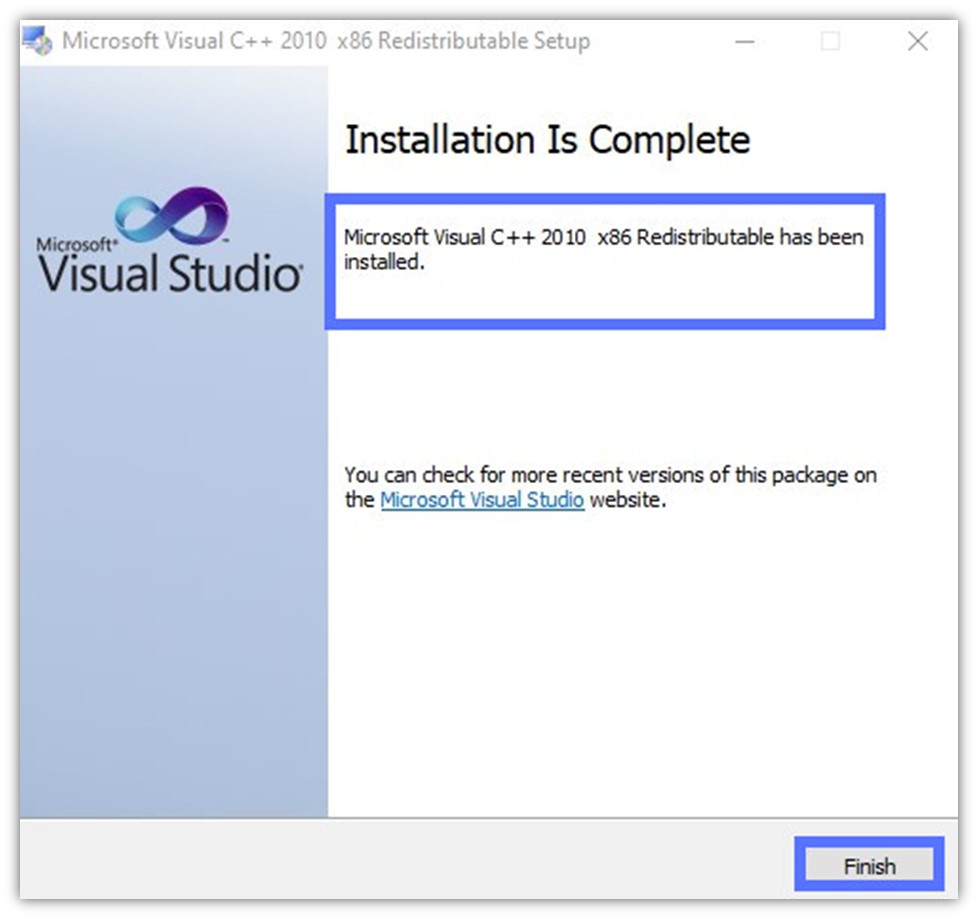
- Download the Microsoft Visual C++ Redistributable 2010 (X86) version. Be sure to download exactly that version, as some of the code you’ll need to sign macros isn’t included in other versions. If you don’t, SignTool won’t recognize the file and will likely give you an error message. Tip: To access the website, you’ll need to enter your Microsoft credentials. You can use your existing username and password for any Microsoft service or create new ones for free.
- Install the software onto your device. Double-click on the installer, accept the terms and conditions and hit Finish to install.
Ready? Let’s Get to Signing…
Great job! Now, it’s time to start signing. In this tutorial, we’ll digitally sign a macro in Excel using the following:
- DigiCert code signing certificate
- Secure USB token.
Save Up to 27% on a Standard Code Signing Certificate
Assert your organization’s verified digital identity to increase trust in your software and updates. Boost your sales and download rates for as little as $195.00/year (with a 3-year certificate).
We’ll show you two ways to do digitally sign your Excel macros: first, in the command line using Microsoft SignTool, and then directly in Excel. Both processes will sign and timestamp your Excel macro. Check them out and pick the method you prefer.
Method #1: Digitally Sign (and Timestamp) Your Excel Macro With SignTool and CMD
If you’re a fan of the Windows command prompt (cmd), this is the process for you.
1. Insert Your Secure Hardware Token
Do it always before opening the cmd. It’ll ensure your token is correctly recognized by SignTool.exe.
2. Open a Command Prompt as Admin
Remember? You’ve learned how to do it in step two in the one-time operations section.
3. Navigate to the SignTool Directory
Copy and paste the command below. Insert the Windows software development kit (SDK) version number installed on your device.
cd C:\Program Files (x86)\Windows Kits\10\bin\YourSDKVersion\x86Tip: The .dll files we’ve downloaded are 32-bit files. That’s why we’ve used the 32-bit version (x86) of SDK/SignTool, and you’ll need to do the same.

If you’ve installed SDK in another directory, use cd C:\ and add the correct file path.
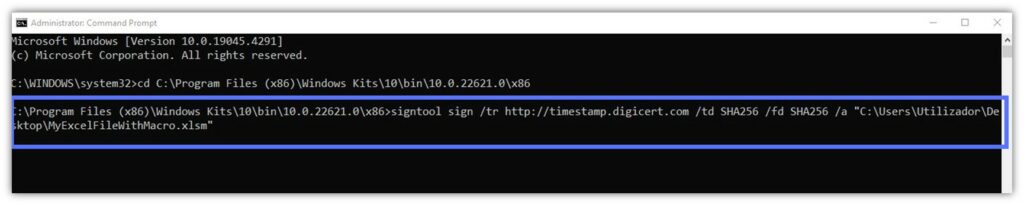
4. Digitally Sign Your Excel Macro and Timestamp It
Copy and paste the SignTool signing command below. Replace the parts in bold with the information related to your timestamp server authority (TSA) and file containing the macro:
signtool sign /tr http://CAtimestamp.server.com /td SHA256 /fd SHA256 /a "C:\filepath\MyExcelFileWithMacro.xlsm"Here is what it looks like for us.
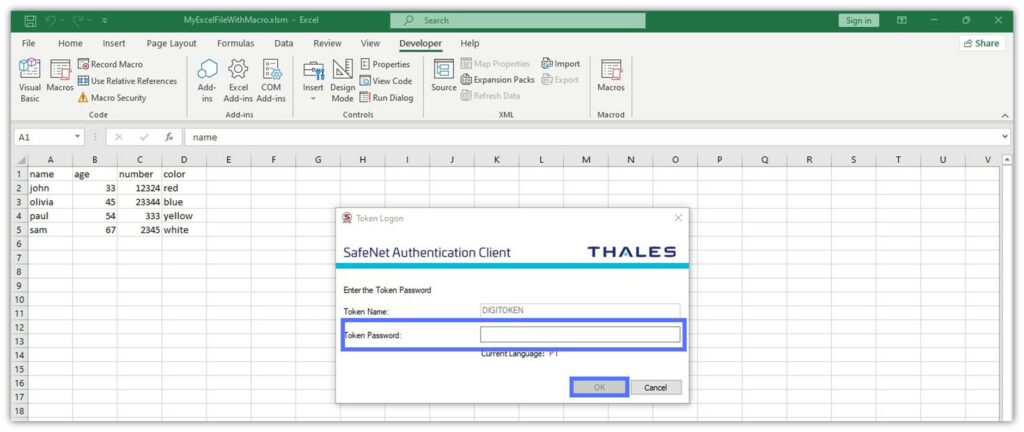
When requested, enter your token password.
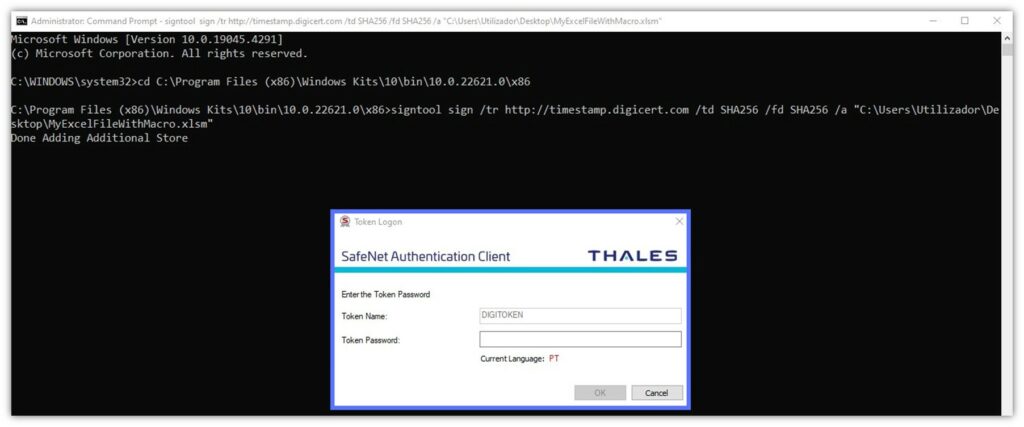
Boom! Your Excel macro is signed and timestamped.

Method #2: Digitally Sign Your Macro Directly in Excel
Would you rather use a more user-friendly interface? Digitally sign your macro directly in Excel. Beware, though, that this method has its limitations. For example, you’ll still have to use the cmd and SignTool to add a timestamp. If you don’t add a timestamp, your signature will be invalid when your code signing certificate expires.
You could also add a timestamp by editing your device’s registry. However, we don’t recommend it. Even a small mistake or typo might severely damage your system. So, here are the steps to follow to sign your macro.
1. Open the Excel File
Open the Excel file containing the macro you’re planning to sign.
2. Insert Your Hardware Token
Plug your hardware token into your device.
3. Open the Visual Basic Editor
Click on the Developer tab and, in the Code section, select the Visual Basic icon. The Visual Basic (VB) editor will open.
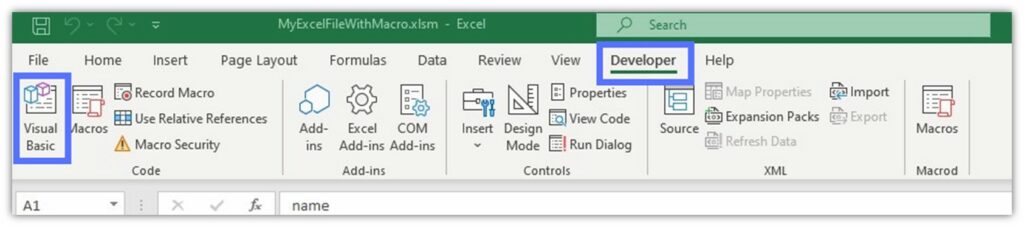
Tip: Can’t find the Developer tab? Click the File tab and go to Options. Click Customize Ribbon and, under Customize the Ribbon, select Developer. Hit OK.
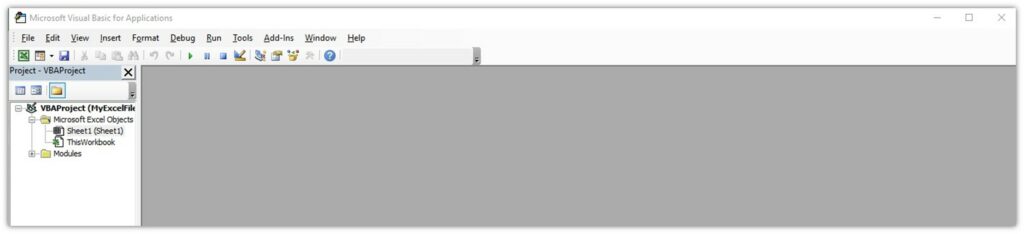
4. Start the Digital Signature Process
In the VB editor, click Tools and Digital Signature. A new window will open.
5. Choose the Code Signing Certificate
In the editor, click on Choose.
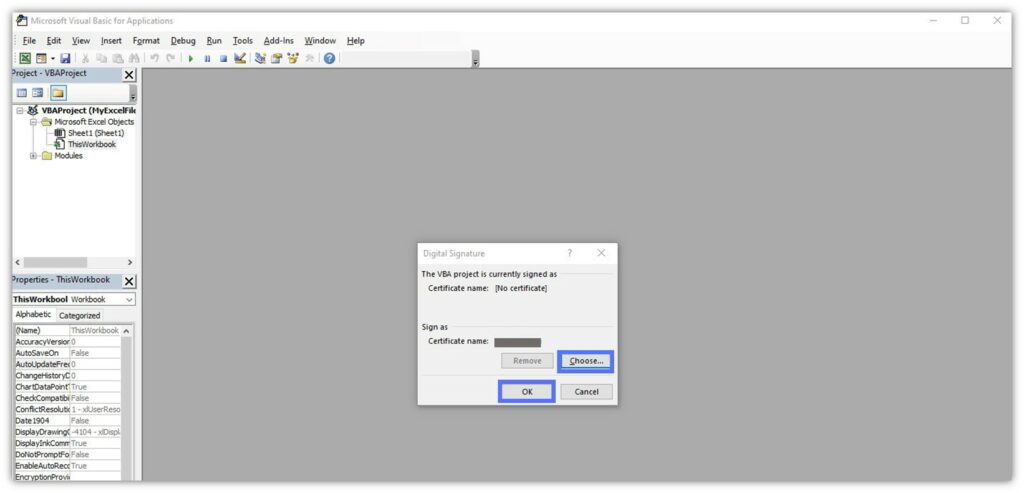
A new box will display the digital certificate linked to the private key saved on the USB token. Here, you’ll select the certificate and click OK.
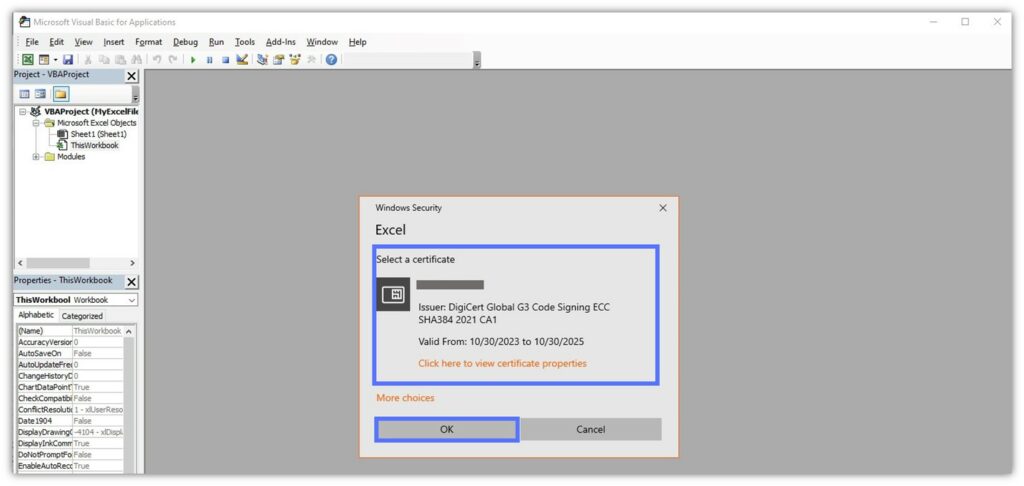
6. Apply the Signature and Save Your Excel File
The code signing certificate name will appear on the pop-up window, as shown below:
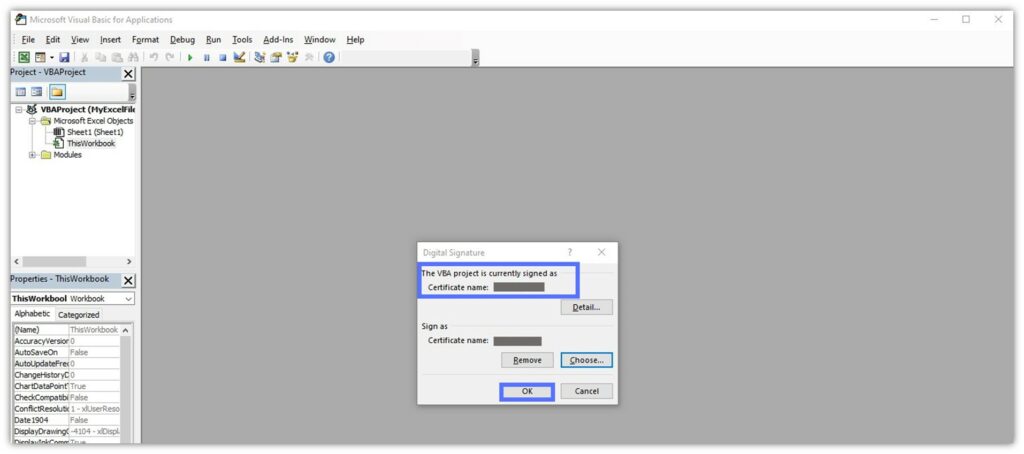
Image caption: The VB editor confirms the certificate chosen for the signature.
If the correct certificate is selected, click OK again. Close the Visual Basic editor and save the Excel file. At the prompt, type your code signing certificate password.
This is how it should look:
The magic is done. Congratulations! You’ve just signed your first Excel macro. You won’t get any official confirmation message, but don’t worry. In a moment, we’ll walk through how to verify your Excel macro digital signature, too.
Before we do that, let’s make sure the signature remains valid even when the code signing certificate expires.
7. Add a Timestamp to Your Excel Macro Digital Signature
Open Window Command Prompt as administrator, navigate again to the SignTool folder, and type the following:
signtool timestamp /tr https://yourCAtimestamp.com /td SHA256 “PathtoYourExcelFileWithMacro.xlsm“Tip: Replace the details in the script with your CA’s timestamp server and the path to your Excel file.

Verify Your Excel Macro Digital Signature
Let’s check that the Excel macro digital signature has been applied correctly.
1. Open a Command Prompt as Administrator and go to the SignTool Directory
Follow the same instructions described in steps two and three of the first signing method listed in this article.
Tip: If you aren’t already logged into your workstation as admin, you’ll be required to enter your admin password.

2. Verify the Excel Macro Digital Signature Applied
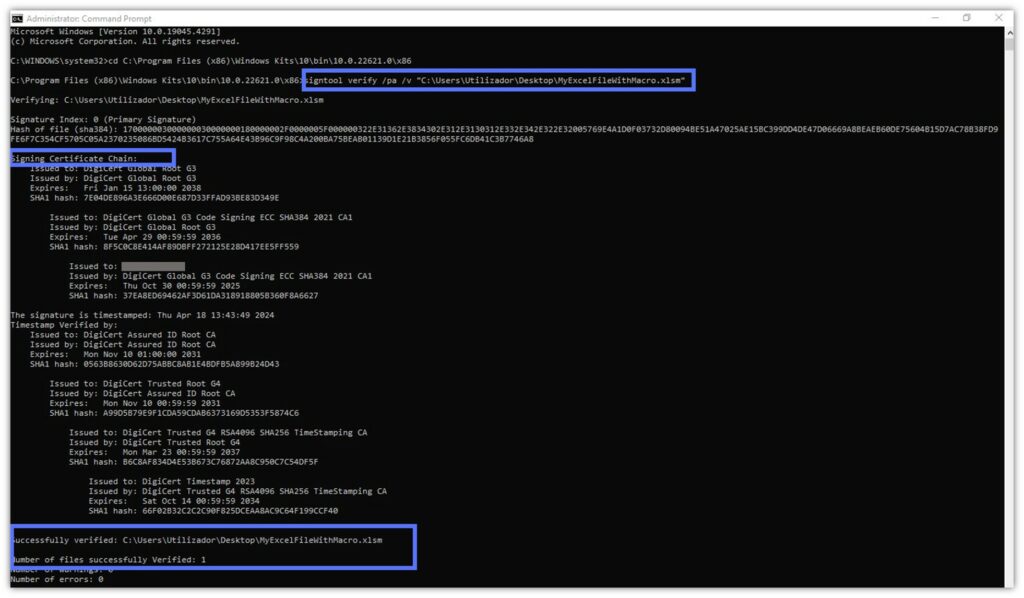
Copy and paste SignTool’s verify command (signtool verify /pa “c:\filepath\MyExcelFileWithMacroSigned.xlsm) and hit enter. As usual, be sure to type the correct path to your Excel file.
If you see something akin to the example below, congratulations! This verification message means you’ve digitally signed your Excel macro correctly.

Tip: Want to view even more details about the signature (e.g., the certificate’s chain of trust and more information about the timestamp)? Go “verbose” and use this command instead: signtool verify /pa /v “c:\filepath\MyExcelFileWithMacroSigned.xlsm”
Here is what we got when we used it to verify our signature.That’s a lot of interesting information, right?
What Happens When You Digitally Sign Your Macros in Excel
Since January 2022, macros have been disabled by default in Microsoft Office due to security concerns. Adding a digital signature to your Excel macros takes security a step further as it:
- Proves to the world that your macros are authentic and haven’t been tampered with since you’ve signed them,
- Reassures users by fostering digital trust in your brand and products, and
- Shields your legitimate Excel macros from being used in phishing attacks, thereby protecting your employees and other software users.
Moreover, now that all code signing private keys must be stored on FIPS 140-2 Level 2 or Common Criteria EAL 4+ equivalent hardware (as a minimum), attackers won’t be able to steal them so easily and use them to sign malware.
AnyDesk learned the lesson the hard way a few months ago what happens when your keys aren’t as secure. Cybercriminals stole code signing keys and source code during an attack on the company’s production servers. As a result, they had to revoke all certificates, issue software updates signed with new code signing certificates, and reset all customers’ passwords.
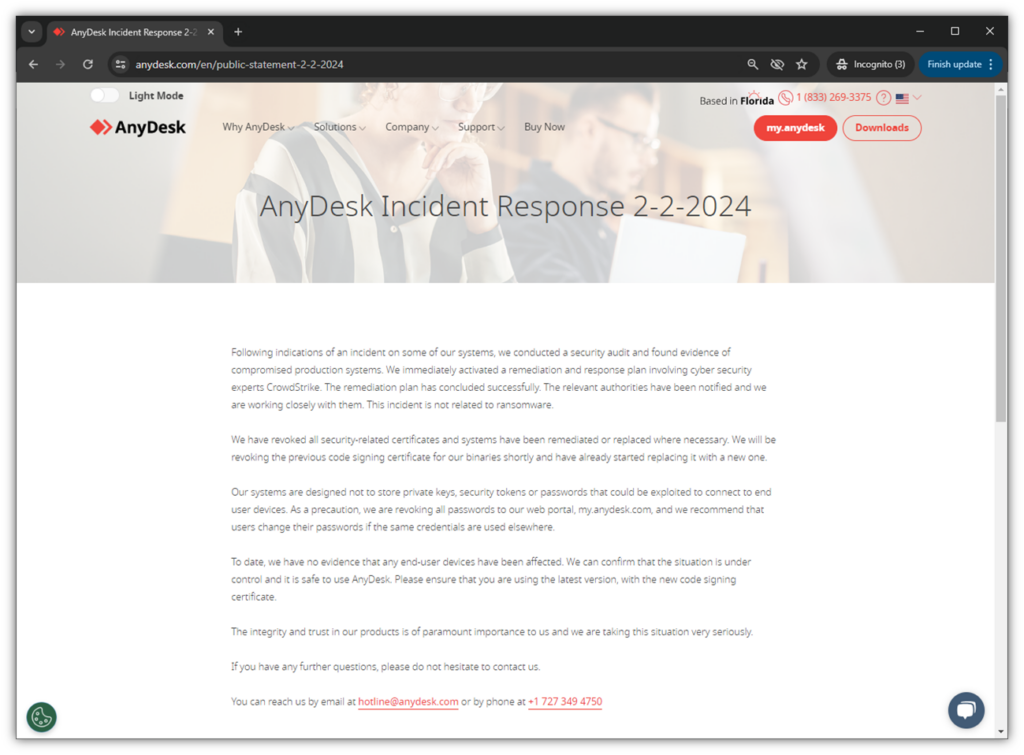
If this wasn’t enough, a few days later Resecurity discovered over 18,000 AnyDesk customer credentials up for sale in the dark web.
Wondering what FIPS 140 Level 2 hardware is and what it does? Find it out in this video:
Excel Macro Digital Signature: How It Works in Less Than 35 Seconds
To digitally sign an Excel macro, you:
- Hash it using a secure algorithm
- Add a timestamp, and
- Digitally encrypt the hash value (i.e., digest) using your private key.
- The code signing certificate containing info about your verified digital identity and public key as the signer are bundled and attached to the macro file.
The digital signature confirms to your Excel users that the macro (and the Excel file) is coming from you (i.e., authenticity) and that it hasn’t been modified by an unauthorized third party (i.e., code integrity). Discover the ins and outs of code signing and the risks of publishing unsigned code in our linked detailed articles.
The short video below gives a straightforward explanation of how digital signatures work behind the scenes (a concept that also applies to code and macro signing).
Final Thoughts About How to Digitally Sign a Macro for Excel
Regardless of which approach you take, when you digitally sign your macros for Excel, you add a layer of security to your document and to the data in it. As a result, your organization will be protected from unauthorized modifications of the macro files, and your users will be able to enjoy the benefits of using them without fear of being infected by malware.
The signing process is simple. Purchase a code signing certificate, install the signing software, and you’re good to go. Besides, did you know that you can use the same certificate to sign (and secure) several other files and software? From drivers to C# code, executables, and application manifests.
Don’t compromise on security. Get your code signing certificate, pick an application, and start signing it now.
