

How to Install JarSigner in Windows (3 Steps)
 (4 votes, average: 5.00 out of 5)
DigiCert predicts that in 2024, digital trust will be at the foundation of organizations’ hardware and software security strategy. Prove the authenticity and integrity of your Java software with JarSigner. Discover how to install it in Windows in just three easy steps.
2023 was a rough year for organizations and users alike. As per Apple’s commissioned study, ransomware attacks reported in the first nine months of the year exceeded the total amount registered in the year 2022.
Data breaches didn’t lag behind. In fact, they reached a new high when the devastating MOVEit attack hit over 2,600 organizations and more than 90 million individuals. Is 2024 going to be brighter? We sure hope so.
However, it doesn’t look like it will be. According to Bridewell, ransomware as a service (RaaS) will boom. Checkpoint (like many others) predicts that cybercriminals will tap into artificial intelligence (AI) to develop cost-efficient, sophisticated new malware.
Unsigned software enables attackers to embed [1] malware into it without users’ knowledge. This can have devastating effects as users have no way to validate the authenticity of this seemingly innocent software and executables.
Want to start the year with a bang as a software developer/publisher? Empower your users to verify the authenticity and integrity of your Java Archive (JAR) files. Learn how to add JarSigner to your Windows secure development arsenal in just three steps. We’ll walk you through the process step by step on Windows 10.
JarSigner: How to Install It in 3 Steps
Code signing certificates enable developers and software publishers to confirm that an executable or driver is came from them and that a malicious third party hasn’t modified it without their knowledge or approval.
But what about JAR files? Can you use the same digital certificate to sign those, too? Yes, you can, thanks (in part) to a little command tool called JarSigner, part of the Java Development Kit (Java SDK). Let’s learn how to install it on Windows 10 quickly and easily.
Don’t have a code signing certificate yet? No worries. We can help you remedy that.
Boost User Trust in Your JAR Files — Save Up to 21% on a Java Code Signing Certificate
Prove your Java apps and JAR files are legitimate by signing them with a Java code signing certificate. You can get one starting at $211.46/year.
Ready to hit the books and take full advantage of the money you’ve invested in the code signing certificate? Let’s get the ball rolling.
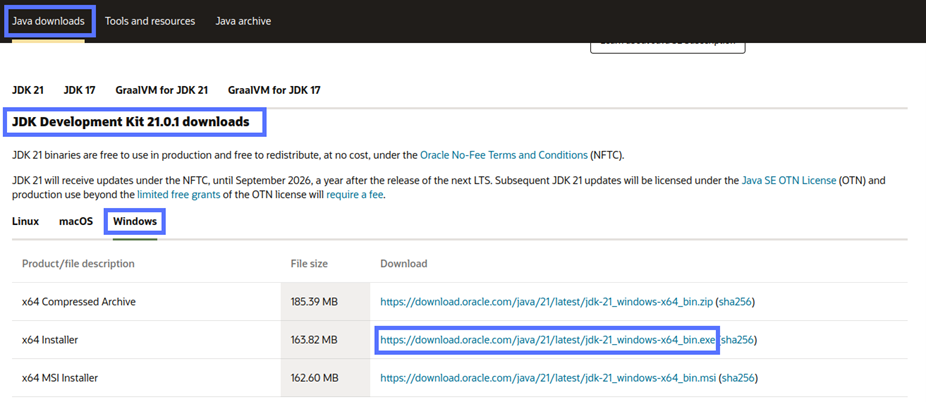
1. Download the Java Development Kit Installer
- Go to Oracle’s Java Downloads page and look for the latest long-term support (LTS) release of the JDK. At the time of writing this article, it’s JDK 21. This is what we’re going to use for this example.
- Select Windows as the operating system. NOTE: Java SDK is available only for Windows x64 (64-bit) systems.
- Click on the installation file link and save it on your device. In this demonstration, we’ve chosen to use the .exe installer and save it in the download folder.
Is your download complete? Great, let’s move to the next step.
2. Verify the Integrity of the Download
To ensure the file hasn’t been corrupted or modified by a malicious third party, you must verify its cryptographic checksum (i.e., a unique string of letters and numbers acting as the file’s fingerprint). To do this:
- Click on the SHA-256-related link provided on the Java Downloads page related to the installer you’ve just downloaded (as shown below):
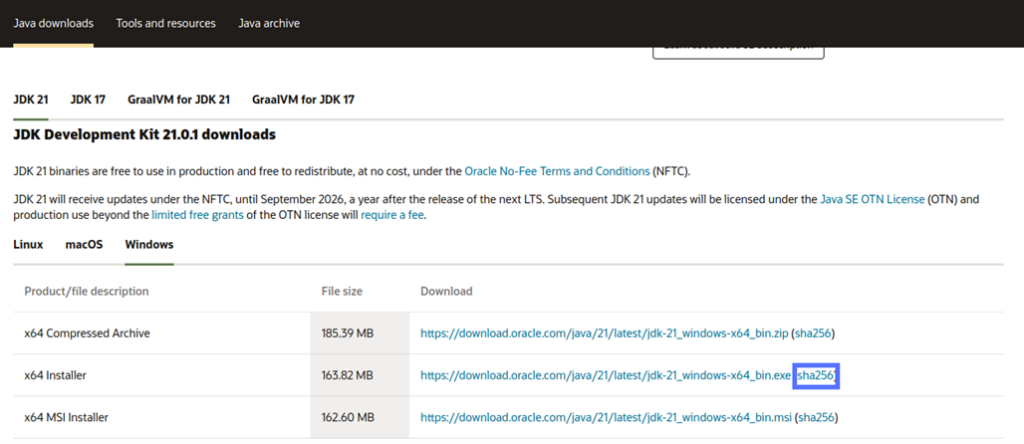
NOTE: Do not click on the .exe link itself. Instead, ensure you’re clicking on the parenthetical statement next to that link to access the file’s checksum.
This will open a new tab on your browser, showing the installer’s checksum:

- Use the Windows certUtil command to generate a new checksum and compare it with the original one. Do they match? Perfect!
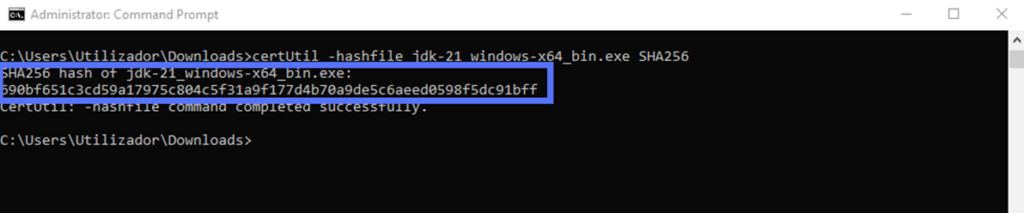
They don’t match? Alarm bells should be ringing! If the hash values don’t match, the installer might be infected or have been corrupted during download. Try to download it again. If you get the same result, you should immediately delete the file and contact Oracle support.
3. Install Java SKD and JarSigner
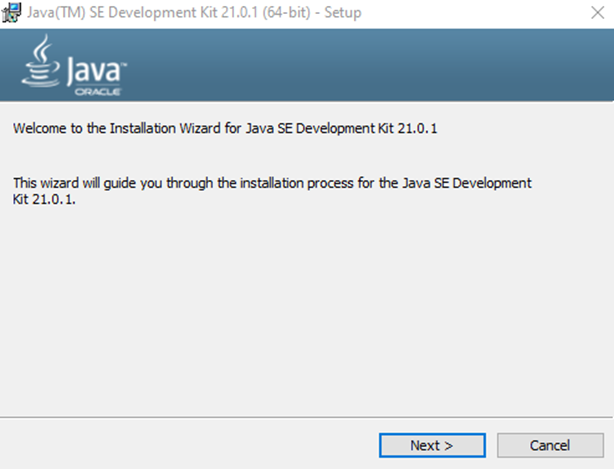
Now that you’ve downloaded the correct, authenticated executable, it’s time to run the installer.
- Go to the local folder where you’ve saved the .exe file and double-click its icon/file name. Did you download the .msi version instead? That’s fine. The installation process is the same.
- Follow the installation wizard’s instructions.
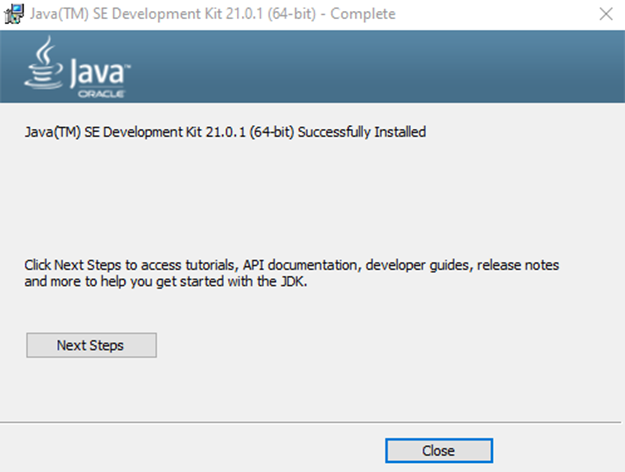
Ta-da! Java SDK has been installed together with JarSigner.
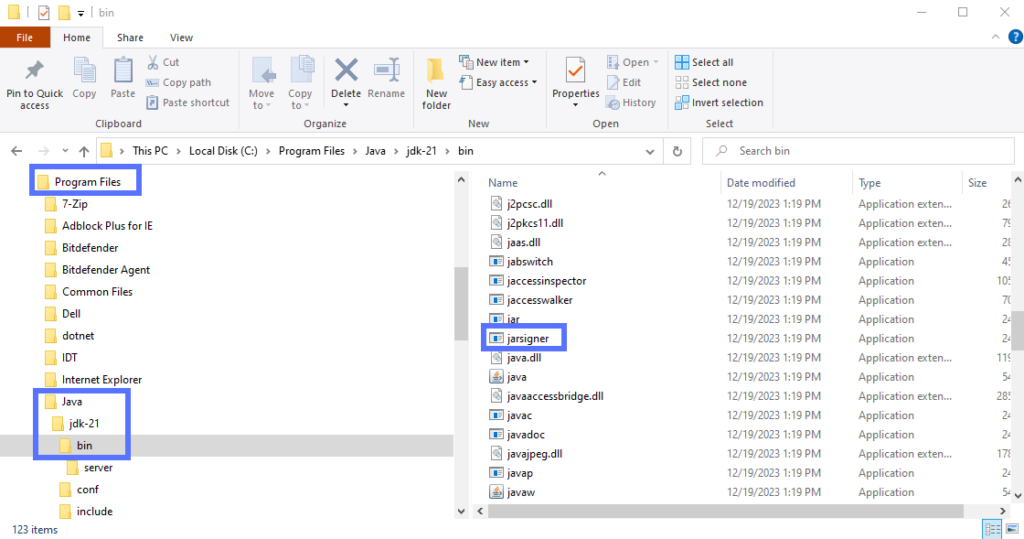
To verify that JarSigner has also been installed with Java JDK:
- Open your device’s Program Files folder,
- Click on Java, jdk-21,
- Open the bin folder and locate the application named “jarsigner.”
Having troubles? Check out Oracle’s JDK installation troubleshooting section.
Now You Can Start Using JarSigner
Isn’t it great? The year just started, and you’ve already learned something new! You can now use JarSigner to sign (and timestamp) all your .jar, .ear, .sar, and .war files with a code signing certificate. You can also use it to verify the validity of their Java digital signatures. The advantages? There are many (click the link to the left to explore them).
Among them, a digital signature will keep malware infections at bay and boost customers’ trust in your products by confirming that your software is:
- Original,
- Untampered with (thus, safe to install), and
- Really made by you.
Save Up to 21% on a Java Code Signing Certificate
Digitally sign unlimited JAR files and applications for as little as $211.46/year.
Final Thoughts on How to Install JarSigner in Windows
Now that you’ve learned how to install JarSigner in Windows, you have everything you need to add a spell of authenticity to your JAR files.
It’ll prove to your customers and users that, even in the era of the rise of AI, they can still trust your brand and your products. On top of it, you’ll also protect your .jar codes from tampering and malware.
Is learning something new part of your New Year’s resolution list? Don’t miss our next articles, which will walk you through the following:
- How to sign a Windows App in Electron Builder, and
- How to use a ClickOnce signing certificate in Visual Studio.
