

What Is a PFX Certificate File and How Do You Create It?
 (6 votes, average: 5.00 out of 5)
Tired of maintaining and securing too many digital certificates and keys? You’re not alone. 72% of organizations say the increasing number of keys and certificates they use is driving them crazy. To ease the pain, learn how to create a PFX file to bundle your certificate and its related key in a single, secure file
In the first three months of 2023, organizations had to fight an average of 1,248 attacks per week. From T-Mobile falling victim to yet another data breach — the second since the start of the year — to the German biotech company Evotec taking its systems offline due to a cyber attack, the volume of security incidents doesn’t seem to stop.
Digital certificates enable organizations to encrypt and keep data and sensitive information safe from attackers. However, in order to use one, it often requires combining the private key and the certificate files into a single bundle. The solution? A personal information exchange file (.pfx or PFX file).
Have we piqued your interest? Learn what a PFX file is and what it does; then discover how to create a PFX certificate in six quick steps.
What Is a .PFX File?
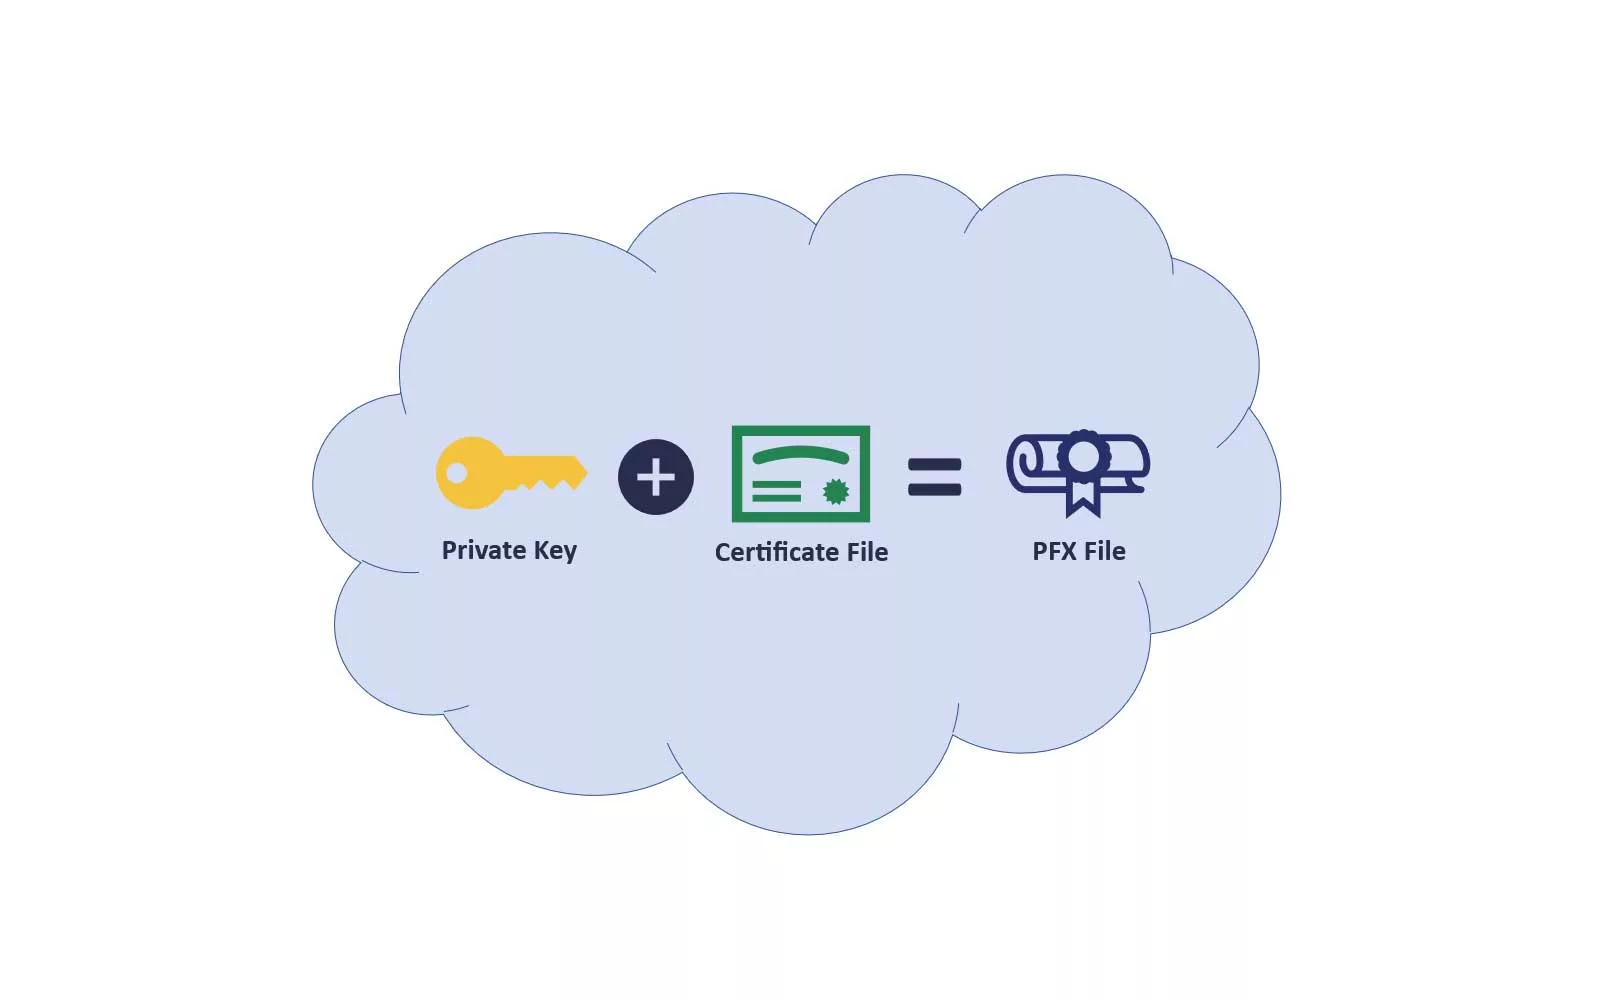
A PFX file is another term for a public key cryptographic standard #12 (PKCS #12) file because it’s one of two file extensions that’s used for this type of file (.p12 and .pfx). Creating a .pfx file is a convenient and secure way to store important cryptographic assets in a password-protected bundle:
- A digital certificate (e.g., a code signing certificate, SSL/TLS certificate, client authentication certificate, etc.), and
- The matching private key file.
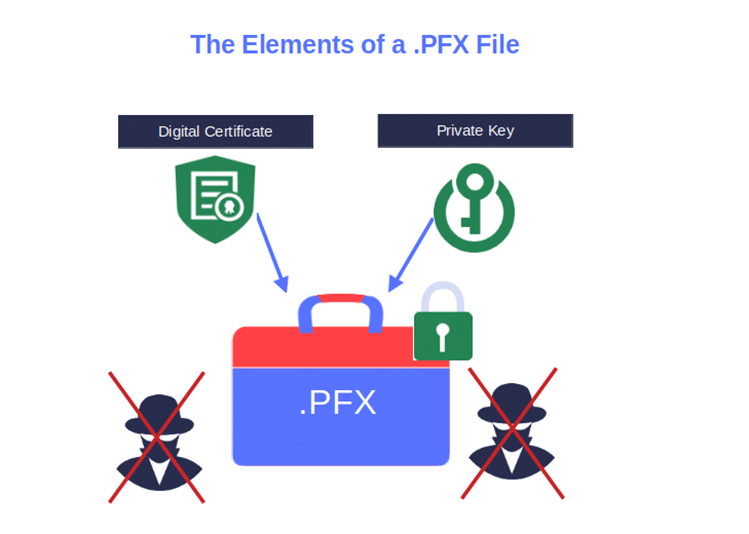
Image caption: The graphic shows how a PFX certificate is created and how it can reduce the risks of private key theft.
Think of it like one of those briefcases used by James Bond, where your digital certificate and keys can be locked up to keep them safe from evil-doers.
Once created, a PFX file has the same capabilities as the components included in the bundle; therefore, it can be used to:
- Sign codes and executables (in the case of a code signing certificate).
- Establish a secure, encrypted connection between a client and a web server (e.g., secure socket layer/transport layer security [SSL/TLS, using an SSL/TLS certificate]),
- Digitally sign emails (using an email signing certificate), and
- Authenticate users or devices (client authentication and device certificates)
Why is it better to separate the digital certificate and key file? Because a PFX certificate is:
- Secure. As it’s protected by a password and its integrity is assured via cryptographic hashing, it adds an extra layer of security to the file bundle. Moreover, the fact that it also facilitates data encryption in transit (e.g., through SSL/TLS certificates) can help organizations to reach compliance with privacy and security regulation (e.g., the Payment Card Industry Data Security Standard [PCI-DSS] where strong data encryption is one of the requirements ).
- Easier to Manage. It reduces the burden on administrators by cutting down the number of files to secure, manage, and transfer between applications or servers.
- Helpful in case of system failure. Do you have a backup of your certificates and keys? You don’t? Save them as .pfx files, and store them onto a secure USB token to keep them safe, and always at hand in case the worst happens. Don’t share it with anyone though. Your private key must remain private.
So, what do you think? Are you in? Good! Let’s learn how to create a PFX certificate in six easy-peasy steps.
How Can I Generate a PFX File?
In December 2022, three GitHub code signing keys were stolen. The certificates were revoked in February 2023. The security breach was contained in part thanks to the fact that strong passwords protected the certificates and keys.
Are you going to be the next victim? Hopefully not. Wrapping together your digital certificate and its related key in a single, password-protected file can help you dodge a bullet. C’mon, let’s start securing those precious assets with the help of Windows GUI-based wizard. All you need is the following:
- A Windows device,
- A digital certificate issued by a certificate authority (e.g., a code signing or an SSL/TSL certificate with extension .cert, .crt, or .pem), and
- Your cryptographic key file (i.e., the corresponding public and private key with the .key extension).
Got everything you need? Let’s go!
1. Open the Certificate Management Console
Go to your Windows start bar and search for your certificate management console by typing ”cert” into the field. Select it and click on Open.
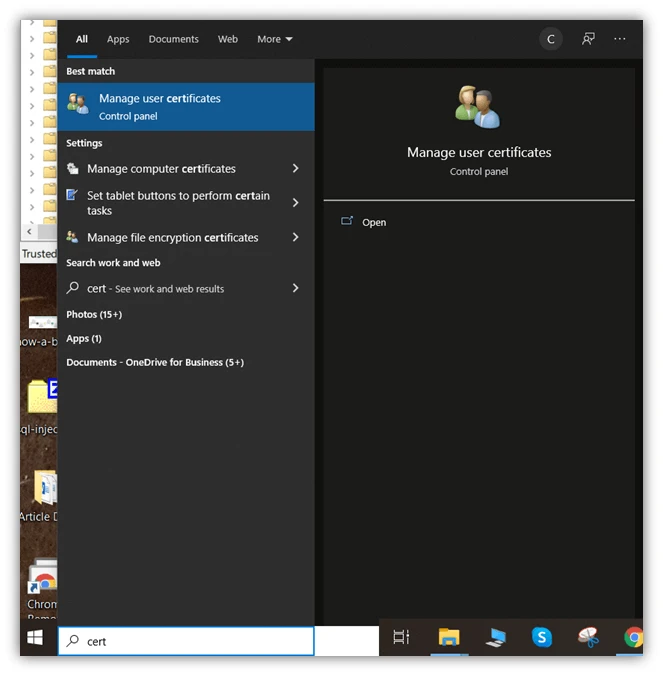
Image caption: The Screenshot shows how to open the Windows management console.
2. Pick Your Digitally Signed Certificate
- Double-click the Personal folder in the pop-up window to view the Certificate folder, then click on that to open it.
- Navigate to the certificate you want to use to create your .PFX certificate.
- To select it, right-click on it, click All Tasks, and then Export.
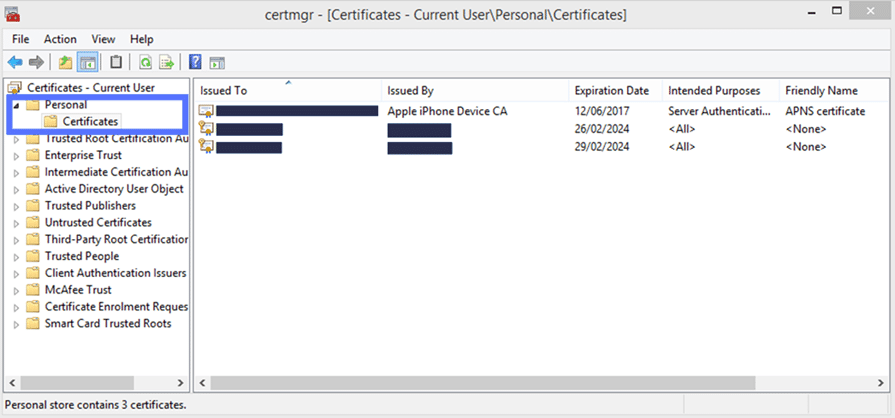
Image caption: The screenshot shows how to get to the personal certificates folder to select the certificate you wish to include in your .PFX file.
This will open the Certificate Export Wizard. Press Next to continue to the next screen.
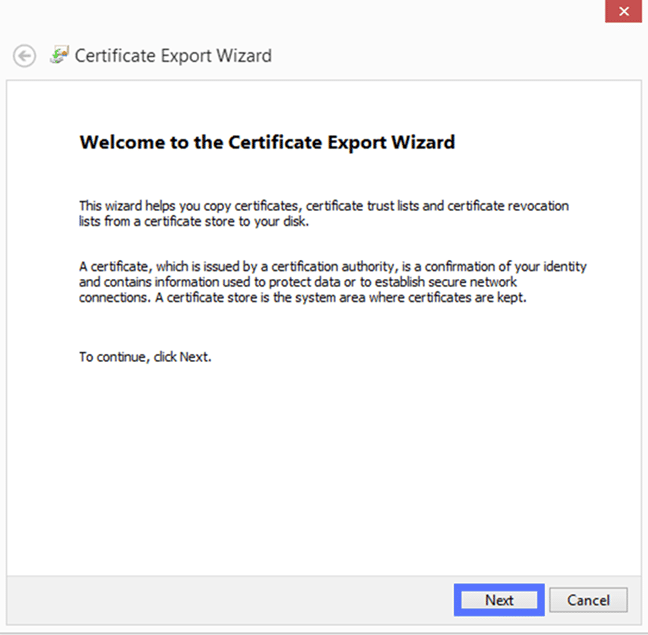
Image caption: A screenshot of the Certificate Export Wizard. Click Next to start creating your PFX file.
3. Export Your Private Key
- In the Certificate Export Wizard (as shown below), press Next and select Yes, export the private key.
- Click Next again.
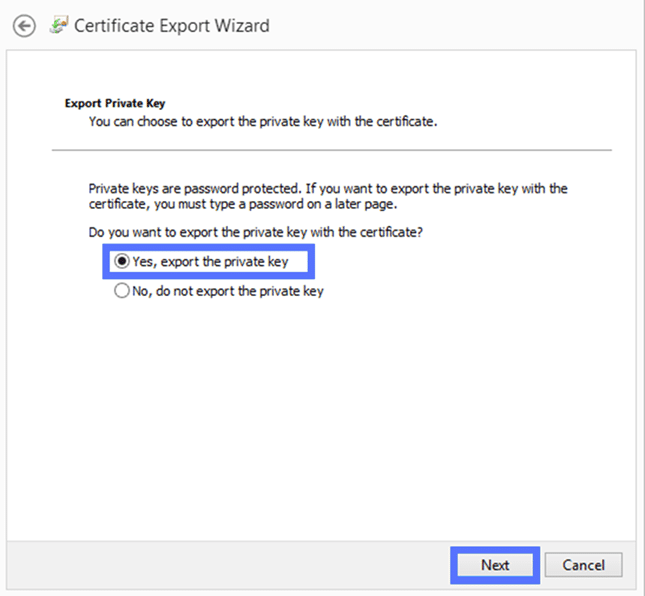
Image caption: A screenshot that shows how to export the private key.
4. Select the Certificate’s Format
This is where you’ll make selections to specify your file type and which certificates you want to include.
- Check the box Personal information exchange – PKCS #12 (.pfx). Sounds confusing? PCKS #12 is the standard archive file format used by PFX files to bundle multiple cryptographic objects (e.g., digital certificates, key files) in a single file. Published by RSA Laboratories, is among the most complex cryptographic protocols.
- Select Include all certificates in the certification path if possible and click Next. Why? To add another layer of security, the CA uses an intermediate certificate (i.e., a digital certificate issued by the CA itself and used to issue other certificates) to sign your certificate. This last option will ensure that the CA intermediate root certificate will be included in your PFX file, too.
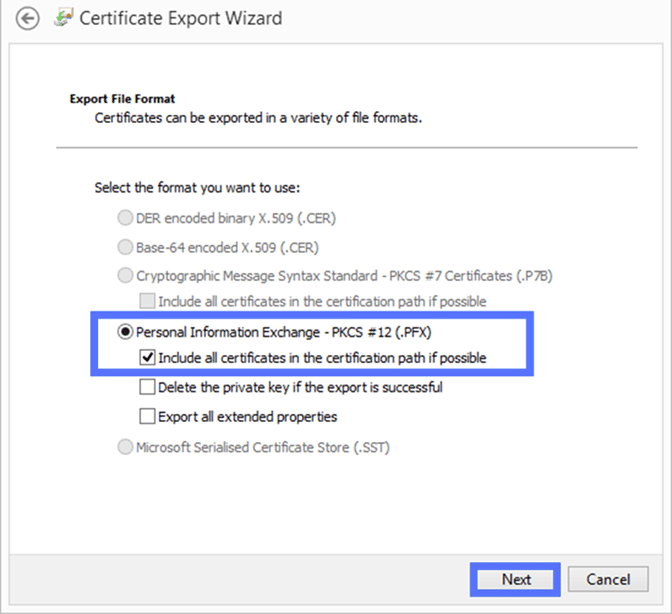
Image caption: A screenshot showing how to select the .pfx file format
5. Enter a Password for Your Private Key
- To secure your key, type a strong password of your choice, and repeat it to confirm it. Click on Next.

Image caption: A screenshot that shows how to protect the private key with a password.
6. Choose Where to Store Your PFX Certificate
- Hit the Browse button to define the name of your .PXF file and where it’ll be saved. For demonstration purposes only, I have saved it on my desktop (as shown in the screenshot below).
- Click Next, followed by Finish. Congratulations! You’ve just generated your first PFX certificate!
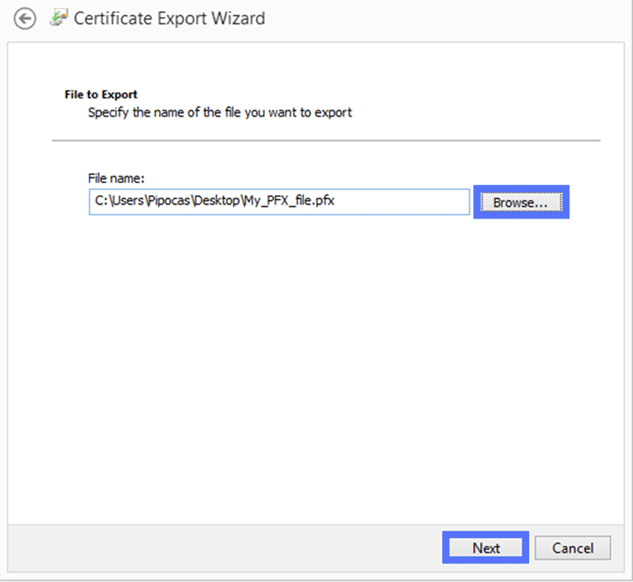
Image caption: A screenshot showing how to select the location where to save your PFX certificate.
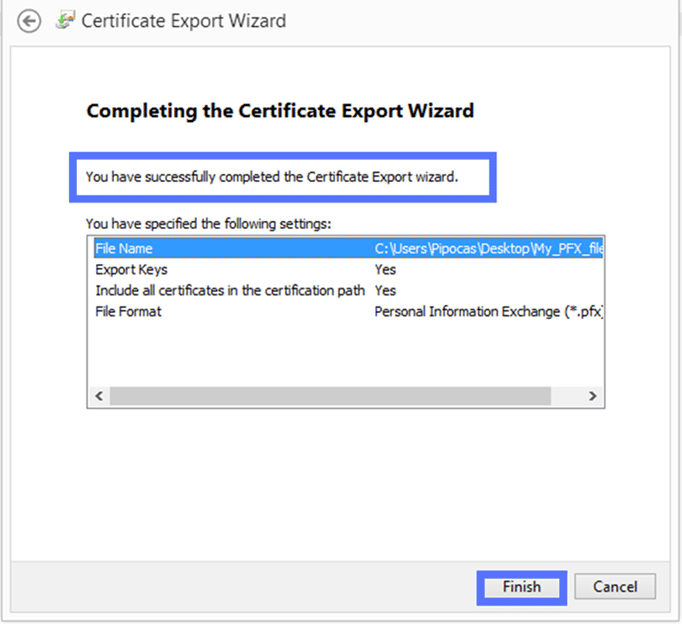
Image caption: A screenshot that shows the final step to how to create a .PXF certificate.
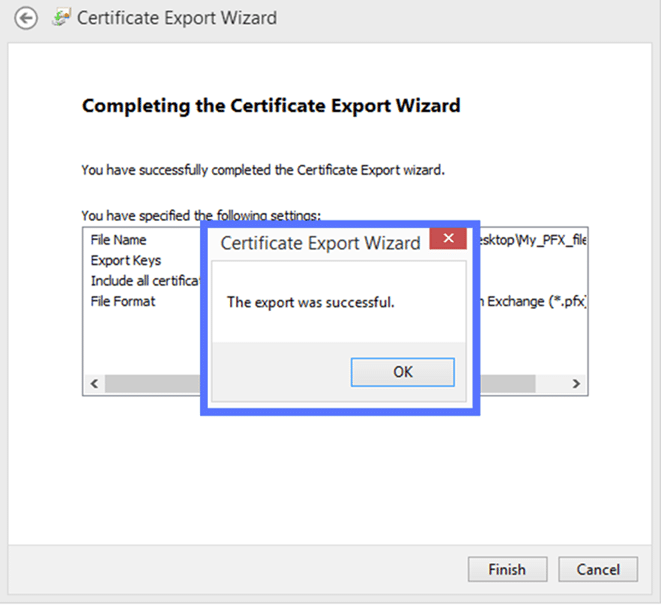
Image caption: A screenshot confirming that the creation of your .pfx file was successful.
Last but not least, navigate to the folder where you saved your PFX file and check to ensure it’s listed to verify that everything worked correctly.
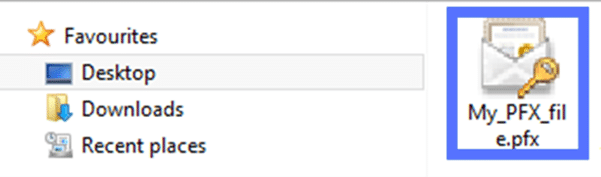
Image caption: A screenshot that shows how to verify if the .PFX file you’ve just generated has been saved in the folder of your choice.
Are you an advanced user and you’d rather use the terminal to generate your .pfx file? You can do that with OpenSSL.
Final Thoughts on What a PFX File Is and How You Create It
As you’ve just learned, adding another layer of security to your digital certificates isn’t rocket science. Now that you know how to create a PFX file, depending on the type of certificate it is you’ve created a .pfx file for, you can use it to:
- Sign your codes and applications (code signing certificate),
- Secure the data transmission between the client and your web server (SSL/TLS certificate),
- Authenticate users or devices (client authentication certificate or device certificate) or
- Encrypt and sign your emails (email signing certificate or S/MIME certificate).
Never lower your guard, though! Cybercriminals are always looking for new ways to break into systems. Therefore, during the .PFX file generation process, don’t forget to choose a strong password. Once it’s created, be sure to store your .PFX certificate securely using a hardware security module (HSM), hardware token, or a key vault. It’s also crucial to follow certificate and key management best practices.
Done? Good, now you’re really ready to enjoy its benefits and start to crack down on potential attacks.
