

How to Combine Your Code Signing Certificate & Private Key in OpenSSL
 (1 votes, average: 5.00 out of 5)
Not sure how to bundle a certificate and private key into a .PFX file? We’ll walk you through how to merge your OV code signing certificate and cryptographic private key using OpenSSL
As a reputable software developer or publisher, it’s crucial to have a way to show users that your software is authentic and came from you (not an imposter). Digitally signing your software with a code signing certificate is one way to achieve this goal. Code signing certificates attack your verified digital identity to your code, containers and software.
Simply purchasing a code signing certificate from a trusted certificate authority isn’t enough. To use it, you first must combine your cryptographic private key and certificate file to create a single, combined file (a .pfx file). Why would you need to do this manually? Because while a certificate authority issues your certificate, you separately generate the private key on your own. (This way, no one — not even the CA — knows your private key.)
While it’s true that some certificate utility tools will enable you to handle everything internally, that’s not always the case. For example, DigiCert’s Utility Tool enables you to generate a CSR and merge your files within the tool so you can simply export a .pfx file. But if you’re not using that tool (or something similar), you’ll have to manually complete the bundling/merging process on the same device you used to create the certificate signing request (CSR).
We’ve already shown you how to how to merge your code signing certificate and key files using SSLshopper.com’s online converter tool. Now, we’ll walk you through how to combine your certificate and private key to create a PFX file for code signing using the OpenSSL open-source command line tool.
NOTE: This article assumes that you already have OpenSSL installed onto your device. If not, you can download the pre-compiled version of the tool from OpenSSL’s Wiki page.
How to Combine Your Certificate and Private Key for Code Signing in 3 Steps
Step One: Get Organized — Move Your .Crt and .Key Files to a Single Folder
Before merging your files, it’s best to ensure you have all your ducks in a row. To do this, you’ll want to ensure you have your certificate and private key files (i.e., those ending with the file extensions .crt and .key) downloaded from the CA. Move both of these files to a central location on your device to keep things simple. You could always use something simple like C:\OpenSSL or C:\CodeSigningCertificate.
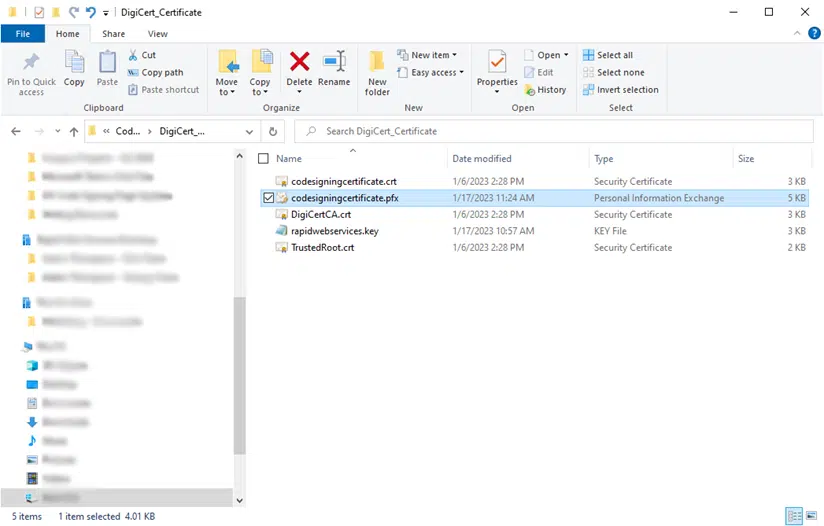
If you have multiple certificates, you may want to be more specific. In this case, we’re using the file location C:\CodeSigningCertificate\DigiCert_Certificate to help us stay organized.
If you have a .p7b file instead of a .crt or .cer file (both .crt and .cer are DER-encoded file extensions), then you’ll need to export the certificate first. Here, you’ll be able to choose the format you want to file to be exported as — in this case, select Base-64 encoded X.509 (.CER). Simply right-click on your .p7b file, navigate to All Tasks and select Export from the dropdown menu to activate the Wizard tool where you can make the .cer selection.
Step Two: Set OpenSSL to Use the Correct Directory
Open the OpenSSL command line and change your file directory using the change directory (CD) command:
cd c:\directory
Continuing with the example directory we’d used in the previous step, this is what the command will look like:

Step Three: Begin the Certificate Export Process (and Enter a Password, If Prompted)
This next step requires you to input a command that uses the certificate and key files you provide to merge and export a new .pfx file. (This file bundles the certificate and private key together.)
You’ll want to use the following command:
openssl pkcs12 -inkey keyfile.key -in certificatefile.crt -export -out codesigningcertificate.pfx
The process will look something like this:

Step Four: Set an Export Password
Now, you may notice a small but important password prompt at the bottom of the screenshot. This is when you can set a password for your code signing certificate (recommended. Simply enter the password you want to use for your certificate password into the command line and hit Enter. You’ll have to do this a second time when you receive the “Verifying – Enter Export Password” prompt.

Is the password you’re typing not displaying? Don’t worry — it’s not an issue with your keyboard. It’s just, apparently, one of those quirks with OpenSSL that your password likely won’t display as you’re typing it. Obviously, this can make things a bit more challenging. So, be sure to carefully type in your password (be extra careful with capitalizations).
If you’re like me and you need to see what you’re typing, consider opening the Notepad app and typing it there. Then, you can copy-and-paste your password into the Export Password field in OpenSSL.
Once this step is complete, your new code signing certificate .pfx file will generate in your selected directory. Yup, it’s really that simple! The next step will be to start using your certificate for signing codes, software, and other executables.
That’s it! Now, it’s time to take that new combined certificate and private key file and put it to use. But there is one last step before you can start signing: you need to import and install your code signing certificate. Click on the link in the previous sentence to get a step-by-step look at how to do this using Windows 10 Certificate Manager.
Having Trouble? We Can Help…
Did you receive an error during the combining your certificate and private key into a PFX file? It’s likely due to the certificate file and key you want to bundle not matching. It’s easy to select the wrong file, so be sure to double-check your file names.
If you’ve double-checked your files and command prompts but it’s still not working, no worries. We’re here to help. Be sure to check out our Support page and reach out to our Customer Support team if you need further assistance.
