

How to Sign an EXE or Application in 5 Steps
 (4 votes, average: 5.00 out of 5)
Did you know that code signing is included in MITRE’s attack mitigation solutions list? If so, great. But if not, read on to become a code signing sensei. Discover how to sign an exe like a pro in five steps.
With a third of data breaches in the U.S. caused by malware, reassuring your customers and end users that your exe or applications are safe to download is paramount. And what’s the best and most efficient way to do that? By knowing how to sign an exe or application using a code signing certificate.
That’s probably one of the reasons why, based on a DigiCert survey, a typical organization manages an average of 50,000 digital certificates. Of course, not all of them are code signing certificates. However, this shows the growing importance of public key infrastructure and digital certificates in our modern digital world.
What about your organization? Do your employees use digital certificates to sign your codes? Moreover, as a developer, do you know how to sign an exe or an application? If the answer is no, don’t get discouraged! You can learn it with us now in five quick and easy steps.
What Do I Need to Start Signing an EXE or Application?
When you need to sign an official document in front of authority, it’ll have to fulfill some prerequisites in order to be valid. The same happens with application signing.
This article will focus specifically on Windows exe and application signing processes and prerequisites. To get started, you’ll need a Windows device and the following:
| EV Code Signing Prerequisites |
| A Windows device. |
| A valid EV code signing certificate. |
| Microsoft SignTool. |
| SafeNet (or any other FIPS 140 Level 2 approved device). |
A Valid Code Signing Certificate
Do you already have your own self-signed code signing certificate? That’s good for internal testing only. However, if you’re planning to sign your exes and applications for publishing, distribution, and download, you’ll need a code signing certificate issued by a trusted certification authority (CA). Why? Major operating systems and browsers won’t trust self-signed certificates because a trusted third party hasn’t verified the publisher’s organization information. No third-party verification, no trust!
Depending on your needs (and budget), you’ll be able to choose between:
- The more secure extended validation (EV) code signing certificate, and
- The basic organization validation (OV) one.
In this example, for reasons that we’ll explain later, we’ll be using an EV code signing certificate.
Microsoft SignTool
Part of the Windows software development kit (SDK), Microsoft SignTool it’s a command line tool that’ll enable you to:
- Digitally sign files, executables, scripts, and applications.
- Time stamp files.
- Verify signatures and time stamping.
Secure Hardware
New industry standards require all code signing certificates’ keys to be stored on secure hardware. One such example is a SafeNet USB token. Make sure you’ve set up your approved SafeNet Federal Information Processing Standards (FIPS) 140 Level 2-complaint device. These devices comply with the U.S. government’s computer security standard for cryptographic module validation.
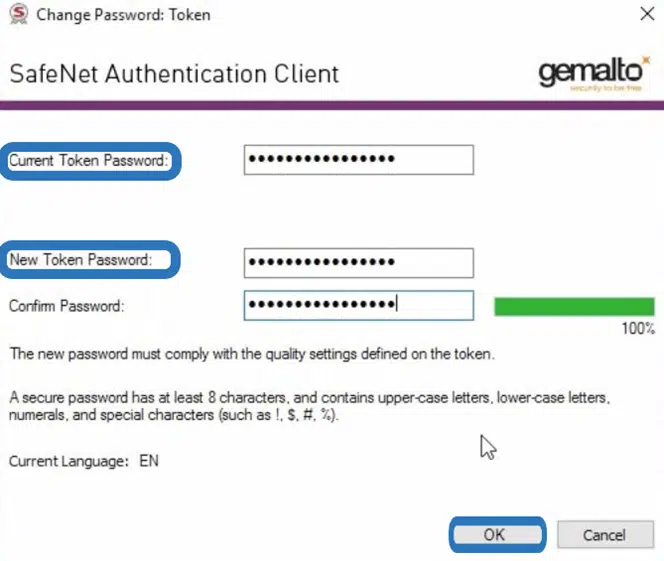
SafeNet’s client authentication software must be installed to be able to use any code signing certificates. If this is the first time you’re using a SafeNet token, you must use your assigned initialization token to gain access to the device to change its default password (as shown below).
To learn more about how to set up your new code signing hardware token, be sure to check out our step-by-step resource.
Now that the prerequisites are done and dusted, you’re ready to learn how to sign an application/exe.
How to Sign an EXE in 5 Steps With an EV Code Signing Certificate Using Microsoft SignTool
Got everything you need? Fantastic. Let’s add another security layer to your exe or app by signing it using an EV code signing certificate. (NOTE: The steps are basically the same for individual validation [IV] and standard code signing certificates.)
1. Insert Your Hardware Token into Your Device. When the CA sent your EV code signing certificate, they did so using a hardware security token (usually a USB device) to securely store your certificate and private key. Take it and plug it into your Windows device.
2. Open SafeNet. just open it and ensure that it’s already set up as suggested in the previous section.
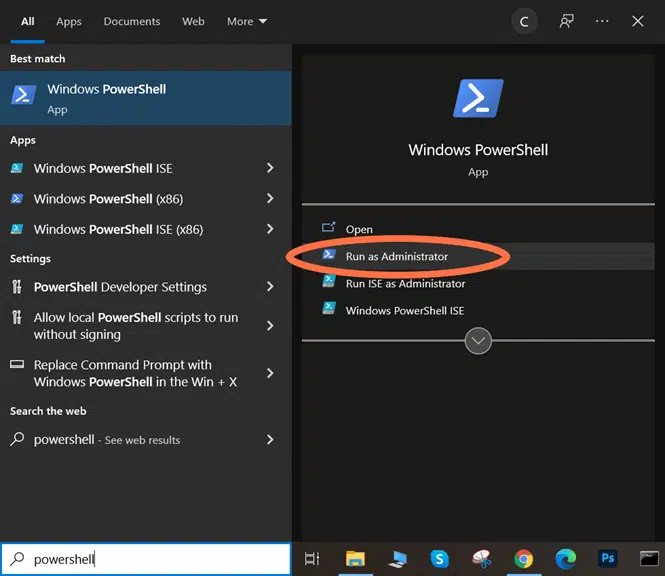
3. Open Power Shell. It’s another command line interface similar to the classic Windows Command Prompt (you can also use CMD as long as you open it as an administrator). PowerShell comes preinstalled in Windows 10. To open it:
- Click on Start.
- Type PowerShell in the search bar.
- Select Run as administrator for the Windows PowerShell application.
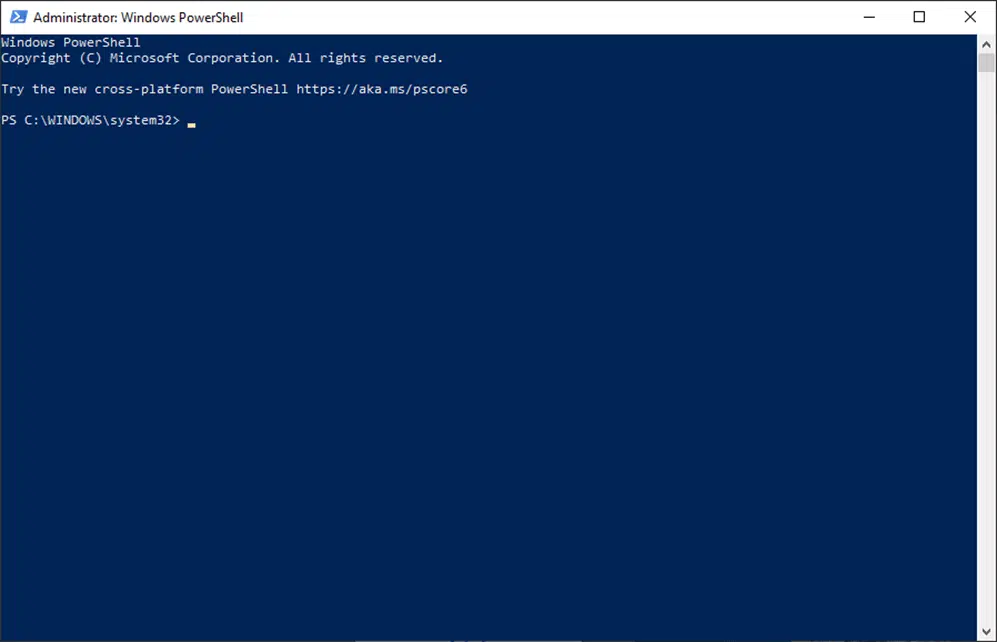
A blue screen like the one below will pop up and it’ll enable you to sign your exe with Microsoft SignTool.
4. Enter the Signing and Time Stamping Command. Code signing is great, however, don’t forget to boost it by also time stamping your code. This will help you avoid issues with expired certificates. Why? Because just like food, code signing certificates are assigned expiration dates. This means that your code signing certificate will expire, too, after a certain amount of time. That’s for sure not what you want to see — neither do your customers.
Since the certificate validity period isn’t edible, there is a way to extend the validity of its signature through time stamping. (Time stamped signatures will be trusted for years to come.) Therefore, to sign and time stamp your exe, enter the following script:
.\signtool sign /tr https://timestamp.digicert.com /td SHA256 /fd SHA256 “c:\path_to_your_file\software_to_sign.exe”
When prompted, enter your code signing certificate password.
5. Type in your SafeNet password. At this point, SafeNet (or the authentication tool you’re using) will automatically open a window and request your password for the token.
Did you enter it? Hooray! You’ve now officially signed your exe or application!
Test Your Signed EXE
What’s the best way to make sure that your exe has been signed correctly and that your customers won’t have any issue with the signature when installing it? Put yourself in your customer’s shoes and try it out. How?
Method #1: Check Your Executable in a Browser
- Upload your signed exe or application on a test/hidden URL. This is a step you can take to check whether your executable is properly signed when a user downloads it in their browser. Is your organization using Confluence? Create a test page, limits its access, and post it there.
- Download the signed exe or application. Download the signed code onto a test machine using Microsoft Edge to test it. Do you see any Microsoft Defender warning messages? For an additional layer of verification, ask a couple of colleagues to access the URL and download the code on their machines. (Checking on three machines is always better than one.)
Method #2: Check Certificate File’s Digital Signature
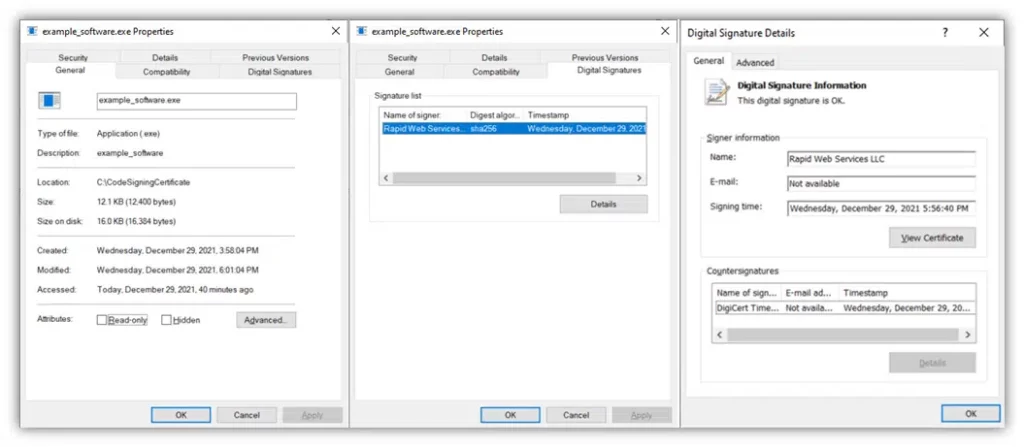
Another way to go about checking the success of your code signing effort is to check whether the executable file shows your digital signature in the file properties.
- Right-click on the signed executable,
- Select Properties in the drop-down menu, and
- Click on the Digital Signatures tab and read through the information listed there.
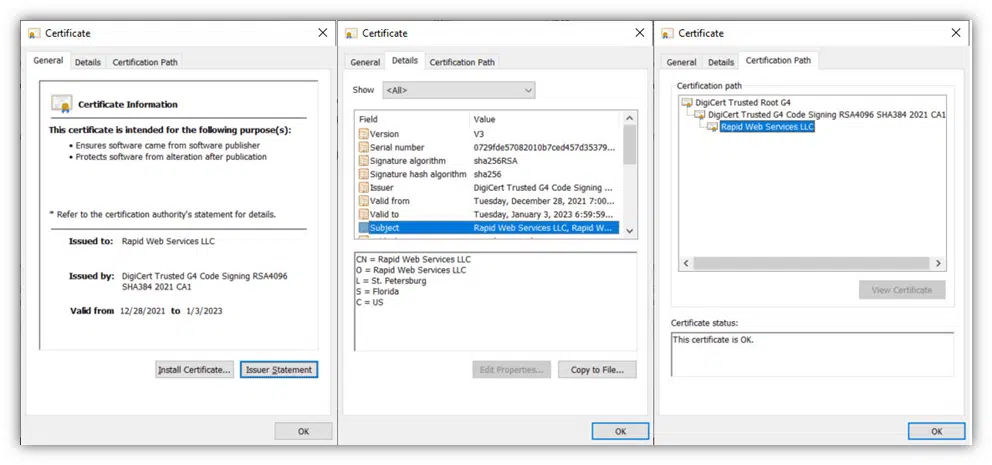
If everything went well, you and your colleagues testing the exe should be able to view the code signing certificate details (including time stamping) similar to the examples below.
Method #3: Verify the Signature in Windows Command Prompt
A third way to check the veracity of your file’s digital signature is to use Windows Command Prompt.
- Open Windows Command Prompt. Do this by opening the Windows run tool and typing CMD.
- Change directory to SignTool. Type cd C:\filepath_to_signtool in the command line tool.
- Run the digital signature verification process. To check your file, enter the verify command and filepath:
signtool verify /v /pa "C:\filepath_to_your_exe_file\software_to_sign.exe"Once the verification process is complete, you’ll receive a wealth of digital signature and certificate-related information. You’ll also see message like this:

What If Something Went Wrong?
If for whatever reason your signature didn’t work you and your users will encounter the following:
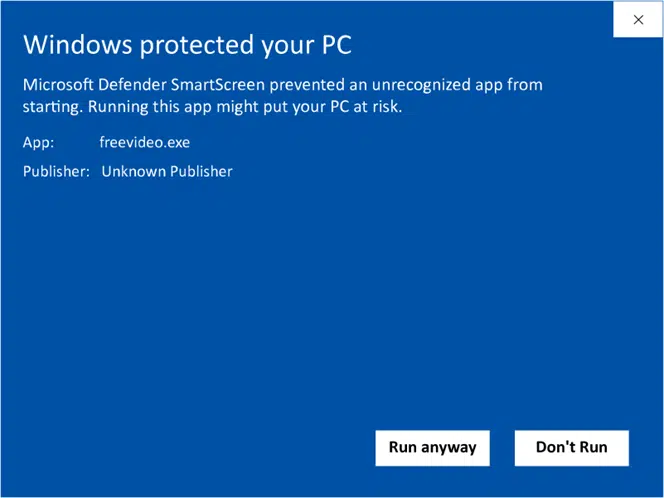
Windows Displays an “Unknown Publisher” Warning
When downloading or installing the exe or application a warning “Unknown Publisher” pop-up message is shown.
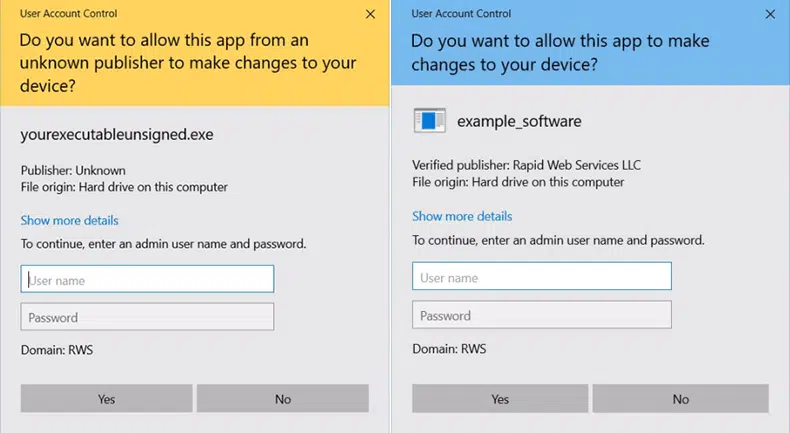
The User Account Control (UAC) Window Displays an Unknown Publisher Warning
When attempting to run the exe or application the Windows UAC window is showing the “Publisher Unknown” message instead of “Verified Publisher” followed by your organization’s name.
The Digital Signature Tab Isn’t Available in the File Properties Window
You can’t find the Digital Signature tab when right-clicking on the saved exe? Something went wrong. Try to sign it again and then again verify the results to ensure the signing was successful.
Code Signing Done Well
Like everything else in the cyberworld, a code signing certificate can be stolen or exploited. The attacker will use it to create infected software that looks perfectly legitimate and try to get access to user-sensitive information. Have you ever heard of APT41? Nope, it isn’t Debian software. It’s a Chinese hacker group that was charged by the U.S. Department of Justice (DOJ) for, among other crimes, stealing organizations’ code signing certificates to get hold of a vast amount of money and data.
Do you want to avoid this happening to you? Make sure you properly sign your codes and that your code signing certificates and keys are correctly managed. Don’t be one of the following organizations identified by KeyFactor and the Ponemon Institute:
- 40% of organizations still tracking their digital certificates using spreadsheets or,
- 60% of organizations without a formal access control process for signing keys
The consequences of distributing unsigned software can be disastrous. Check out the examples below to see how two stolen code signing certificates can easily break havoc in an organization.
- Link and changing information technology hack in 2018. Two stolen code signing certificates enabled the attackers to use those signatures to sign software infected with Plead, a remotely controlled backdoor and password stealer.
- ASUS – Operation Shadowhammer in 2019. Hackers stole two code signing certificates owned by the laptops and mobile phones manufacturer. As a result, they managed to insert backdoors in at least one million devices by simply pushing out signed malware through the ASUS Live Update Utility.
- NVIDIA – the Lapsus$ group hack in 2022. This is one of the most recent cases of stolen code signing certificates. In February 2022, the Lapsus$ hacker group stole, among firmware, drivers, email accounts, two expired Nvidia code signing certificates. Those certificates were used to sign infected software posing as legitimate programs, thus sliding past Windows security controls. Be careful — these certificates are still around. Therefore, if you want to check if your organization has been impacted, look out for software signed by the following serial numbers:
43BB437D609866286DD839E1D00309F514781bc862e8dc503a559346f5dcc518
You can also use a Yara rule for your search, like the one recently published on GitHub.
And there are more, but I think that these examples are more than enough to give you an idea of the scale of the risk. To defend your organization from such attacks, make sure you:
- Protect your private keys. Do you know how many keys there are within your organization’s IT environment? If you don’t, it’s time to do an inventory. Once done, make sure you store them safely using a certified hardware security module (HSM), such as:
- Thales Luna,
- Microsoft Azure Key Vault,
- Egnyte, and
- Many more.
- Ensure that only the right developer can sign the right code. Define specific roles and responsibilities by creating separate roles for those authorized to submit code for signing and those authorized to approve signing requests. Ensuring no one has the ability to carry out both roles on their own will make a potential attacker’s life a bit harder. Constantly tracking the use of private keys and code signing certificates will also help you early identify issues and suspicious activities.
- Integrate code signing with DevOps. By formalizing and integrating your code signing process into your software development lifecycle (SDLC), you’ll ensure that your codes will be signed only after key checks (e.g., QA, virus scan, pen tests) have been performed and identified issues have been resolved. At the same time, your teams will make a step forward toward in putting security at the heart of software development (devsecops).
Final Thoughts on How to Sign an EXE or Application in Five Steps
As we’ve just seen, signing a code isn’t rocket science. As long as you’ve got the right tools in place, this process won’t take a lot of your time. Understanding how to sign an application correctly gives your users and customers a way to differentiate your authentic, safe applications and malware-infected ones. This represents a big add-on to your organization’s cybersecurity strategy.
On top of that, starting Nov. 15, 2022 (Nov. 14 for North American users), OV code signing certificates will be even more secure due to their new key storage requirements. This will enable you to enhance the security of your exe and applications by keeping the keys more secure and minimizing security warnings over time.
What are you waiting for? Now that you know how to sign an exe, you have become a code signing pro! Integrate the code signing process in your organization’s secure coding best practices today. The time is now — don’t give cybercriminals another moment to put your reputation and customers at risk.
