

How to Install a Code Signing Certificate on Windows
 (2 votes, average: 5.00 out of 5)
This step-by-step guide will walk you through how to install a .pfx certificate on Windows 10 Certificate Manager (i.e., how to import a .pfx certificate file). This process works for importing code signing certificates as well as client authentication certificates and email signing certificates
Much like with many other technical tasks, installing a code signing certificate isn’t difficult when you know what you’re doing. But if you’re new to the world of code signing, or you’ve always had someone else install certificates onto your device that you’ve used previously, then understanding the process of how to install a code signing certificate can be a bit tricky to figure out.
A lot of guides you’ll find online walk you through the process of how to generate a CSR for a code signing certificate and others will walk you through how to install them using their proprietary interfaces. However, this means that stuff is happening on the backend where you don’t see what’s happening.
But what do you do if you have a code signing certificate that you’ve generated on your own, outside such tools, and you need to install it onto your Windows device? Finding information to answer that question is a bit more challenging because it’s not often addressed. That’s why we’re here — this article will break down the process of importing a code signing certificate to your device’s personal certificate folder in Windows’ built-in Certificate Manager console (CertMgr.msc).
Get a Code Signing Certificate (If You Don’t Already Have One)
Don’t have a code signing certificate yet? Don’t worry, we can help you remedy that issue quickly. You can get a Microsoft-trusted code signing certificate within a matter of days. This certificate allows you to bypass the Windows Defender SmartScreen errors because it’s trusted automatically by Windows operating systems and browsers.
Save Up to 21% on a Windows Code Signing Certificate
Give users a reason to trust your Windows apps by preventing “Unknown Publisher” warnings. You can digitally sign unlimited apps for as little as $211.46/year.
The nice thing about using an extended validation (EV) certificate in particular is that it also allows you to digitally sign Windows drivers. That’s because, in most cases, Windows requires you to have an EV certificate to sign these critical pieces of software.
How to Install a Code Signing Certificate in the Cert Manager Console
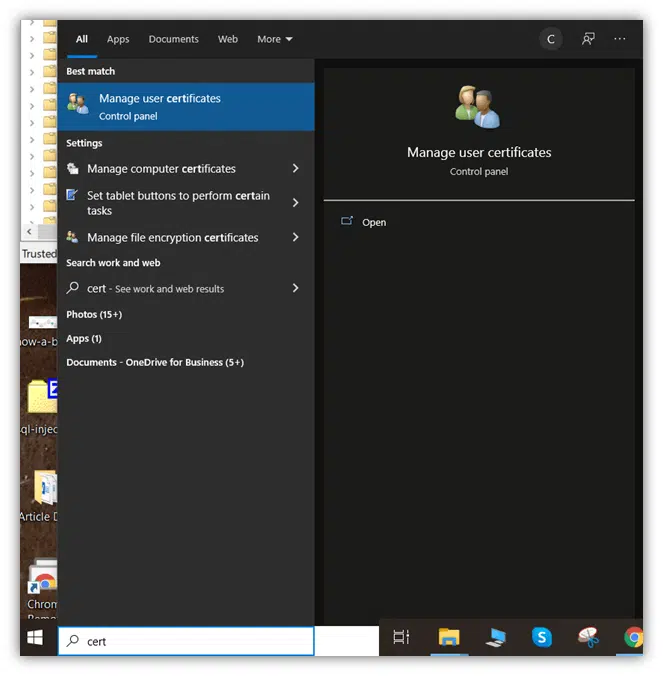
1. In your Start menu, type “certificate” and select Manage User Certificates. This will load a new pop-up window labeled certmgr.
2. In the left-hand menu of this new window, double-click the top folder labeled Personal. This will drop down a menu with another folder beneath it labeled Certificates.
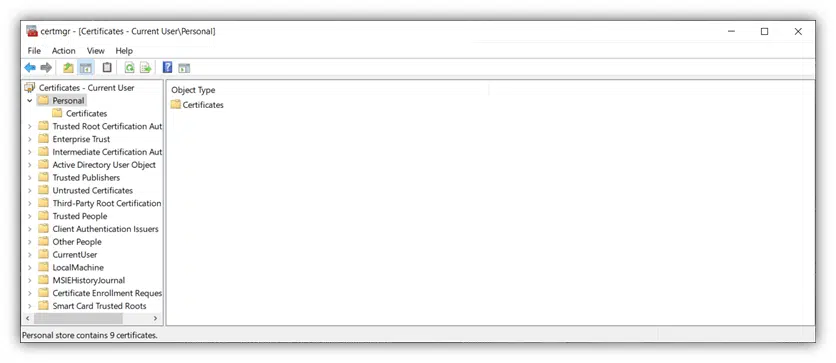
3. Right-click on that Certificates folder and navigate to All Tasks > Import. This will open the Certificate Import Wizard in a new window.

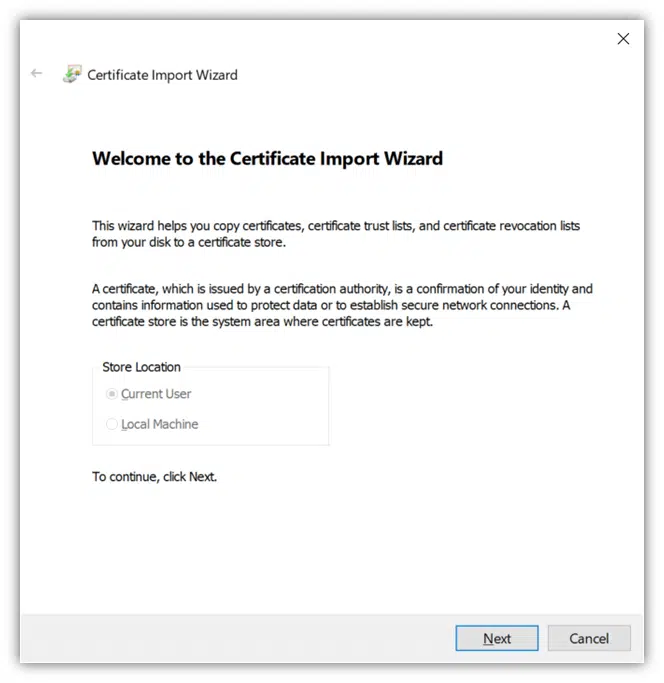
4. The next series of steps of how to install a code signing certificate on Windows involves using the built-in Certificate Import Wizard. In this new window, press the Next button.
5. Select Browse in the File to Import window. This will open up a new screen file screen where you can select your PKCS file (.pfx).
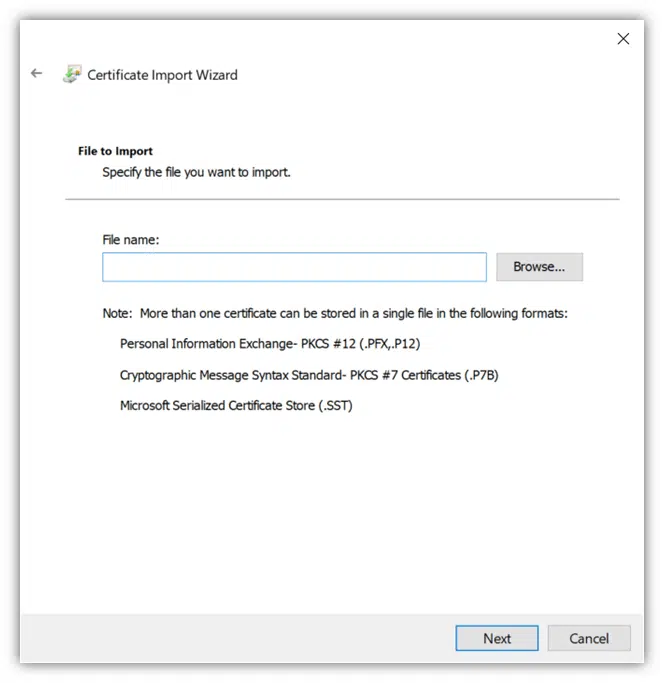
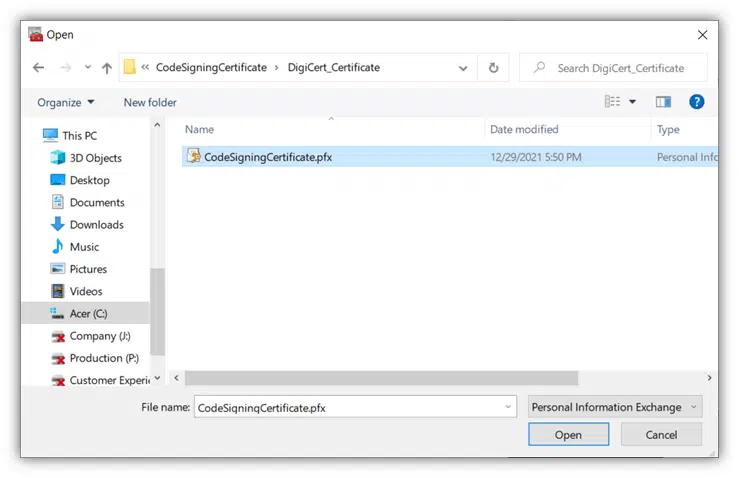
Note: If the file isn’t displaying and all you see are .cer or .crt files, select Personal Information Exchange from the bottom drop-down menu near the file name field. Now, you should see your .pfx certificate file (may also be listed as a .p12 or PKCS12 file).

Note: The .pfx file is your certificate that’s been combined with your cryptographic private key. If you don’t see this file, it means that you first need to combine your key and certificate files to generate the .pfx file. (This can only be done on the same computer that the certificate signing request [CSR] was generated on.) There are a few ways to do this:
1. Use OpenSSL to create your PKCS code signing certificate. OpenSSL is an open-source command line that allows you to handle certificates and their corresponding cryptographic keys manually.
2. Use SSLShopper’s Certificate Converter Tool. This free tool simplifies the process of converting or combining your certificate and key files.
3. Use DigiCert’s Certificate Utility tool. You can use the CA’s certificate utility tool to export the certificate as a .pfx file. This will require having the key already available in the utility tool. To learn more, check out DigiCert’s article on their certificate utility tool
6. Select the .pfx file and press Open. This will return you to the previous Certificate Import Wizard window where you’ll now see your code signing certificate file selected in the previously empty browse field. Press Next.

7. In this next window, you’ll have to enter your certificate password. This is the password you would have created when you first generated your code signing certificate. You can choose to mark your key as exportable or leave that option open depending on your needs. Press Next.
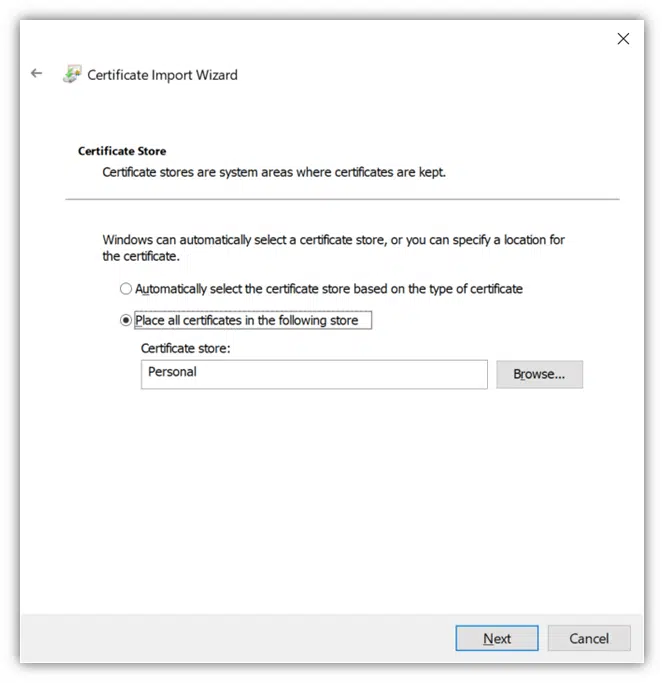
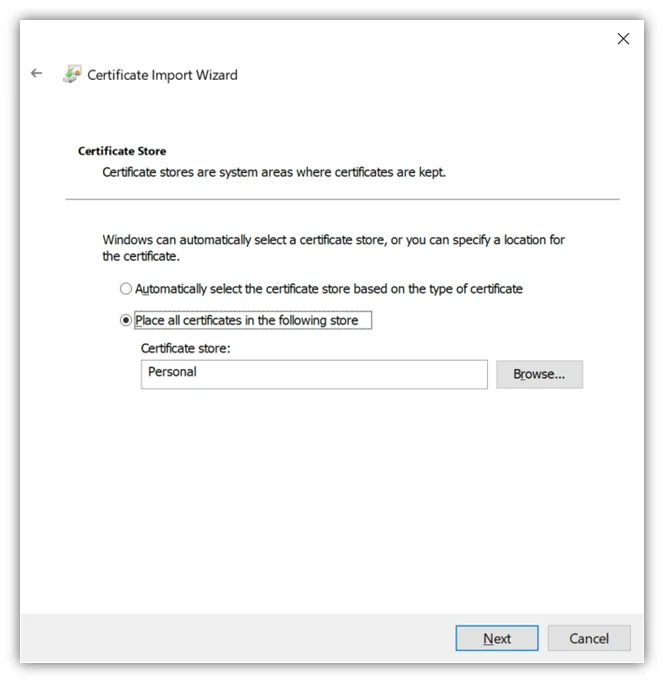
8. Now, you’ll need to select where in your device’s Certificate Store you want to import or install your code signing certificate. The Certificate Store’s Personal folder is selected by default. Press Next.
9. This is the final step in the Certificate Import Wizard process for how to install a code signing certificate on Windows. This screen is the last check to ensure that everything is accurate before you conclude the import process. Press Finish to proceed.
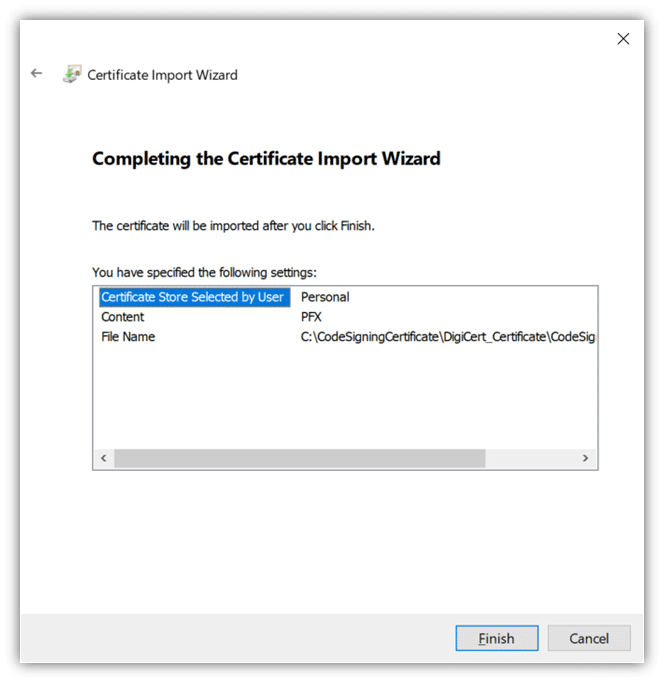
That’s it! You’ve completed the installation process. You should see a message stating, “The import was successful.”

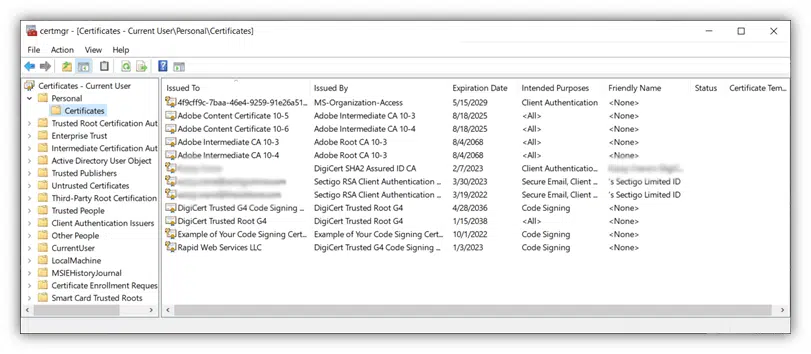
Now, what you’ll want to do next is verify that everything worked as it was supposed to. Go back to your Windows Certificate Manager screen and navigate to the Personal > Certificates folder again. Here, you should see your newly installed certificate listed:
Congratulations! You’ve successfully imported/installed your code signing certificate on Windows.
