DigiCert Certificate Utility –Quickly Sign Your Software Without Errors
 (No Ratings Yet)
Use the DigiCert Certificate Utility Tool to Simplify Your Software Signing Process in Microsoft Windows
Have you purchased the DigiCert code signing certificate?
Hopefully, everything has gone fine, and you’ve got the code signing certificate issued. If not, refer to this guide on How To Complete Validation For Your Code Signing Certificate.
Now, the only process you’re left with is to digitally sign your software using the DigiCert code signing certificate that you just purchased, right?
Well, the software signing process isn’t that hard. Download the DigiCert Certificate Utility software for Microsoft Windows and go through these steps, and you’ll have your software signed within a matter of minutes.
How to Instantly Sign Your Software Using the DigiCert Utility Tool
- First, if you’ve bought an EV Code Signing Certificate, you’ll want to connect that token/device (which includes the private key) to the computer.
- Now, Download the DigiCert Certificate Utility executable (DigiCertUtil.exe) onto your Windows server or workstation.
- Run the executable DigiCert® Certificate Utility for Windows.
- Double click on DigiCertUtil.
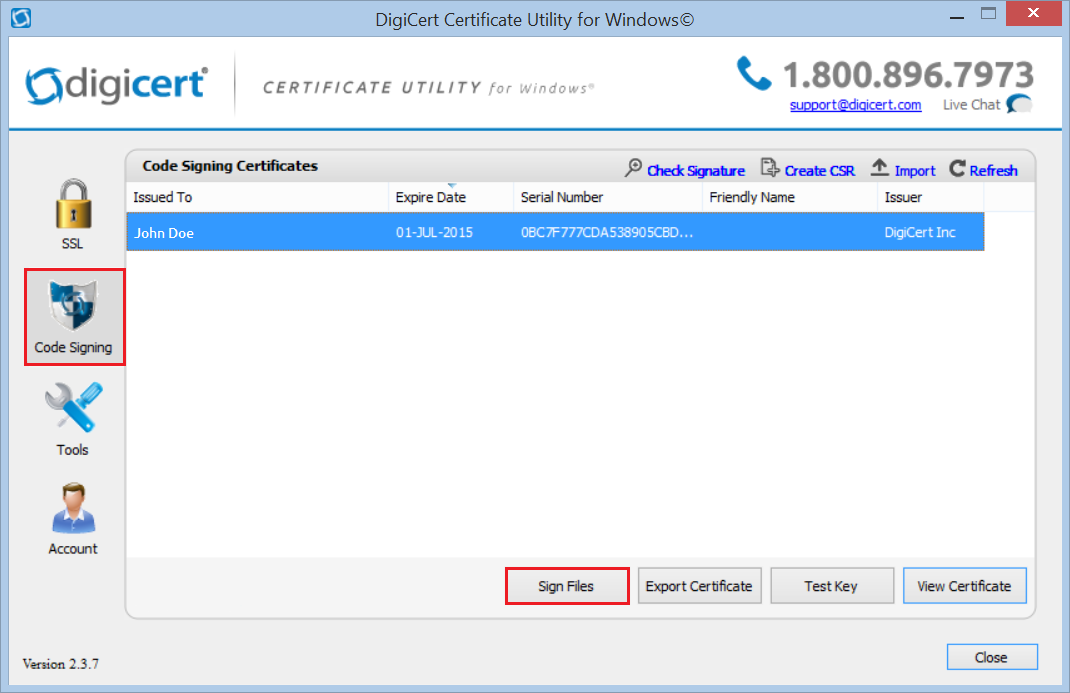
- Once the DigiCert Certificate Utility for Windows© opens, click on Code Signing (a logo of the blue and silver shield on the left side).
- Select the Code Signing Certificate that you’ll use for signing your software and then click the button Sign Files.
- If you’re not able to see your EV Code Signing Certificate, it means you haven’t plugged-in your token yet. So, please do it now.
Once the Code Signing window opens like below, click Add Files button, then locate and select the software or any other executable file you’re want to sign using your DigiCert code signing certificate.
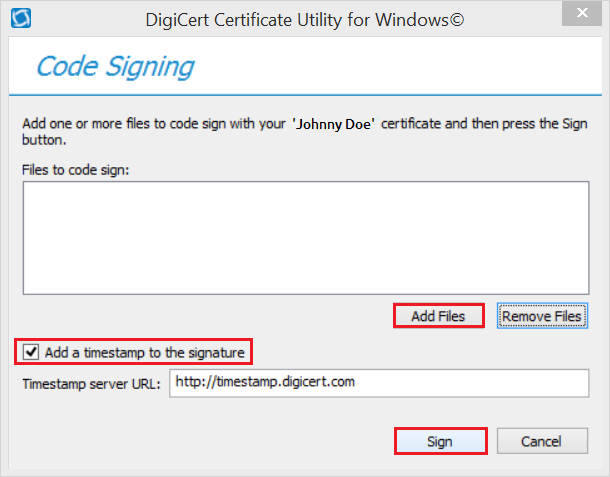
Timestamping is optional but highly recommended. Check the Add a timestamp to the signature option.
- For adding a timestamp, make sure you’re connected to the Internet.
- Signing software with a timestamp allows your signature to stay valid even if the Code Signing Certificate expires.
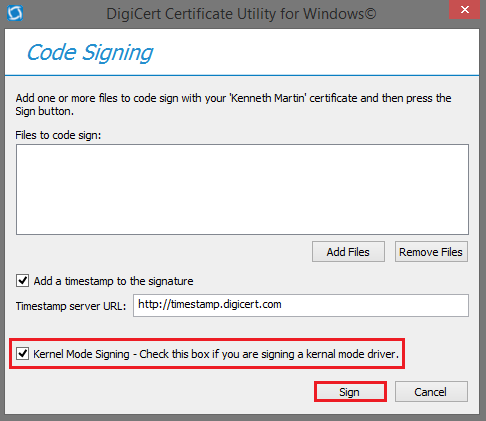
Depending upon the format you’ve chosen for your certificate, you may or may not see Kernel Mode Signing. However, it’s optional. If you’re signing a kernel-mode driver and see this option, it’s suggested to check it.
Lastly, click the Sign button. Once your software gets signed, you’ll receive pop-up like below displaying message: “All the files have been successfully signed” and then you can click the OK button.
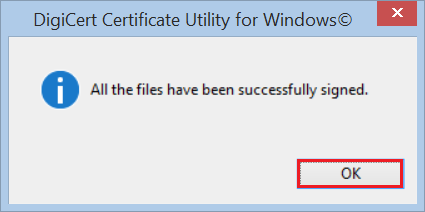
If you see the above message box, congratulations. You’ve signed your software successfully without any error, and it’s ready to use.
How to Verify Your Software Signature – Software Is Signed Correctly
Click Code Signing (blue and silver shield logo on the left side) in the DigiCert Certificate Utility for Windows©.
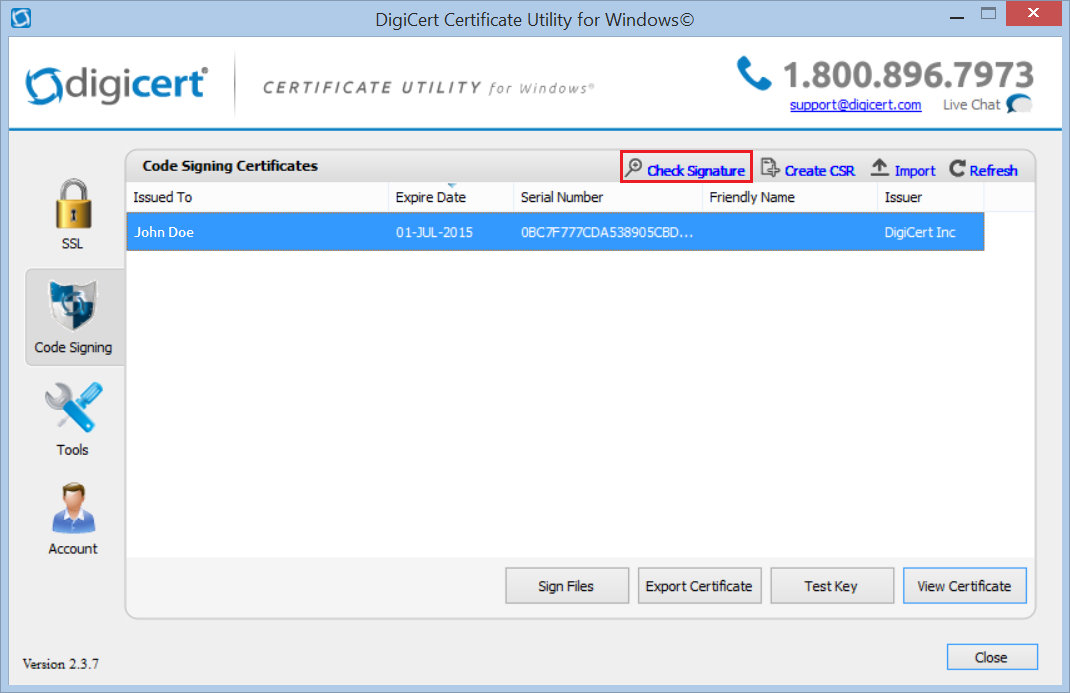
Now, click Check Signature option at the top right side and open the software file for which you want to verify the signature.
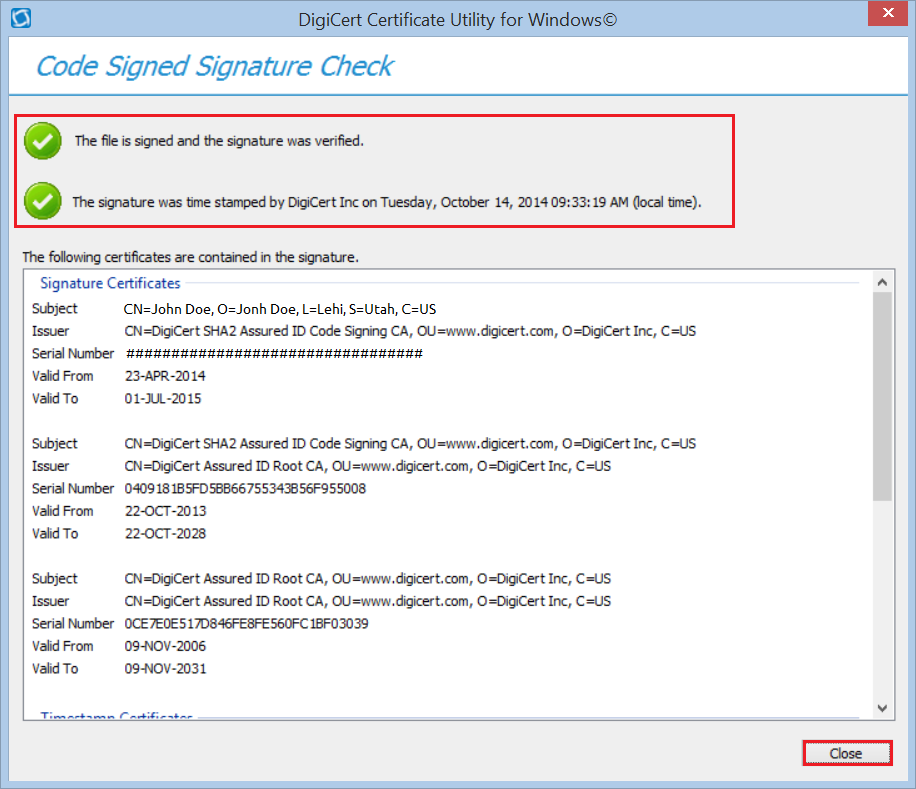
Once the Code Signed Signature Check window opens, you want to see a green checkmark titled “The file is signed, and the signature was verified.”
If you’ve added a timestamp at the time of signing, you want to see another green checkmark for it: “The signature was timestamped by DigiCert Inc on ‘Date and Time’”.
Lastly, if you’ve checked Kernel Mode Signing, the page will also show the information regarding Kernel Mode Cross Certificate.